Okta: An Overview and Function
What is Okta and What Does Okta Do?
Okta connects any person with any application on any device. Okta is an enterprise-grade identity management service built for the cloud that is compatible with on-premises applications. It enables IT to manage employee access to applications and devices securely. Okta runs on a secure, reliable platform that integrates deeply with on-premises systems.
Key features include provisioning, Single Sign-On (SSO), Active Directory (AD) and LDAP integration, multi-factor authentication (MFA), and mobile identity management, all supported by the Okta Integration Network (OIN) for seamless app integration.
SSO (Single Sign-on):
With the SSO module, you can utilize single sign-on functionality by directly integrating with the identity provider and leveraging the OpenID Connect framework. This module allows end-users to log in with their Mendix account with the click of a button, instead of requiring their local user credentials. This avoids having to deal with local user management or password reset flows for the test and acceptance phases of your app development.
What do we need?
In this Blog, we will explore how we can directly log in to the Mendix Application using Okta. Here, the Mendix version is Mendix 9.24.1.
Download the following modules from the Mendix marketplace
-
1. SAML2.0 Module
-
2. Encryption Module
-
3. Mx Model Reflection Module
Steps to Configure Okta into Mendix
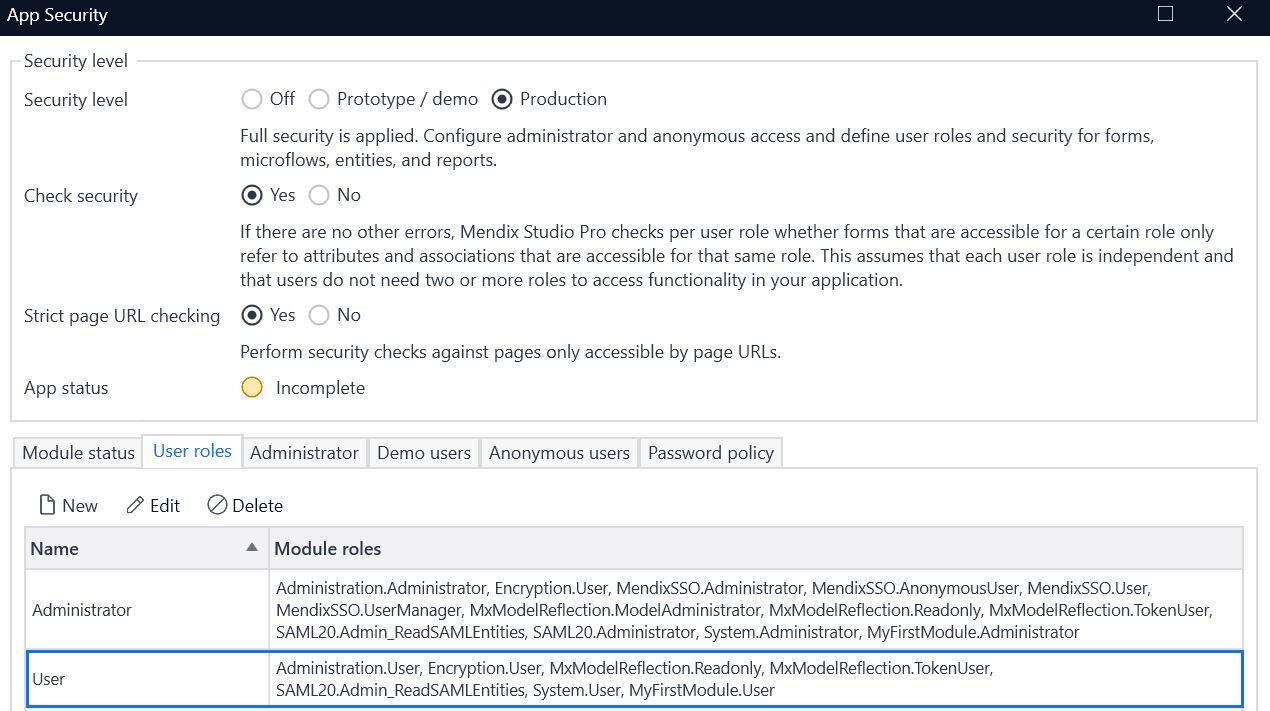
Step 1: Set the security into the Production level and configure User roles.
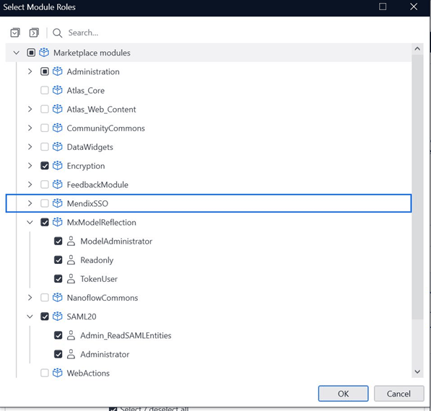
Step 2: Set the ‘Administrator’ user role access while configuring as shown in the image below.
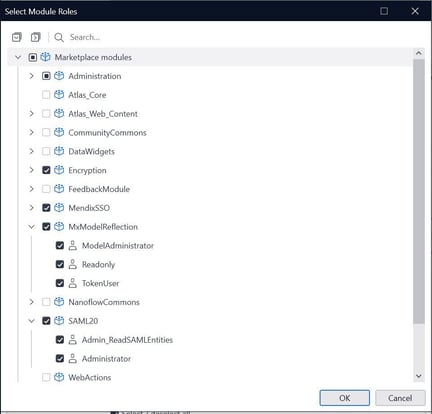
Step 3: While configuring, set the ‘User’ role access as shown in the below image.
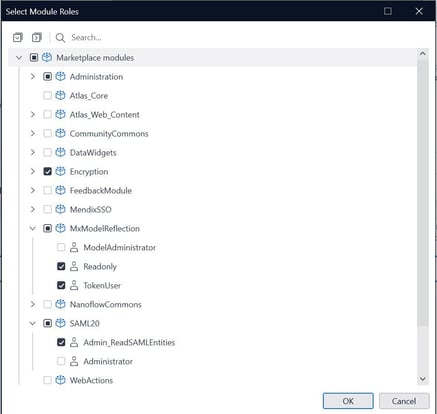
The following image is the reference for the Administrator & User module roles.
Step 4: Set the app constant Default Log-in Page in the SAML module to be login.html.

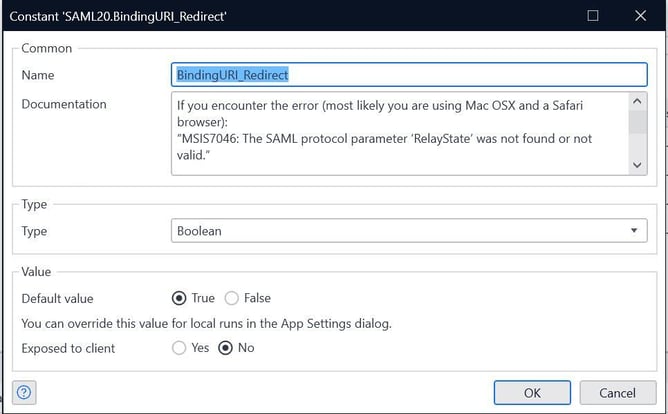
Set the app constant Binding URI_Redirect in the SAML module to be True.
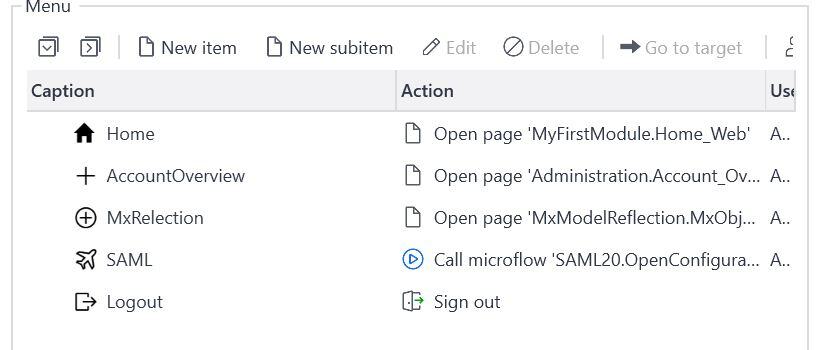
Step 5: In the Navigation menu, give the Administrator access to the MxModelReflection and SAML Module Overview Pages. Also, give access to Manage User Accounts.
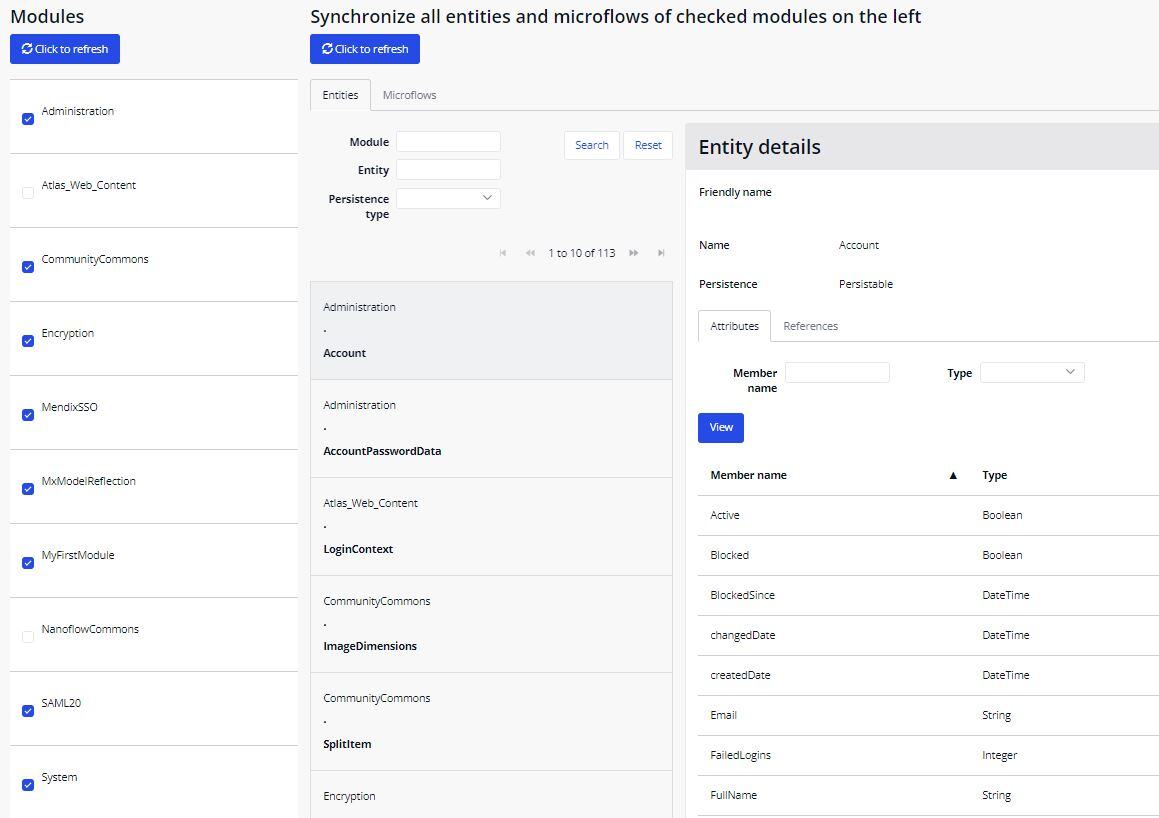
Step 6: Now run the app locally and sync the reflection data of all the modules.
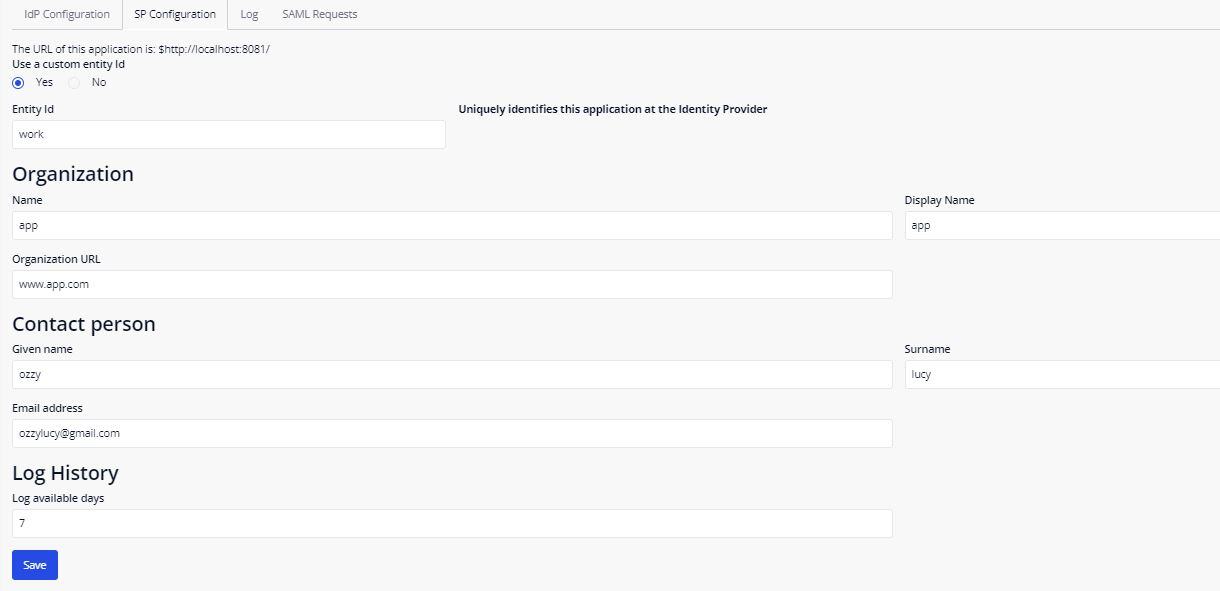
Step 7: Configure the SAML Page as shown below.
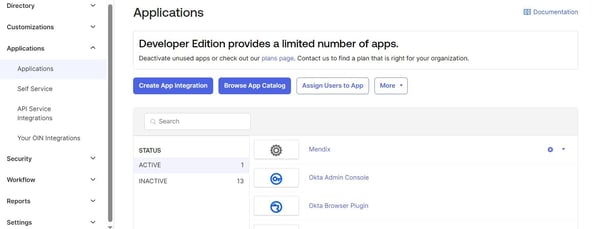
Step 8: Now open the OKTA developer account and select Applications from the Menu tab. Click the “Create App Integration” button.
Step 9: Now create a new app integration in the OKTA developer portal.

In the General Settings, enter the App name and logo of your choice and click Next.
In the SAML Settings, input the configuration details as shown below. Click 'Show Advanced Settings' for full configuration.
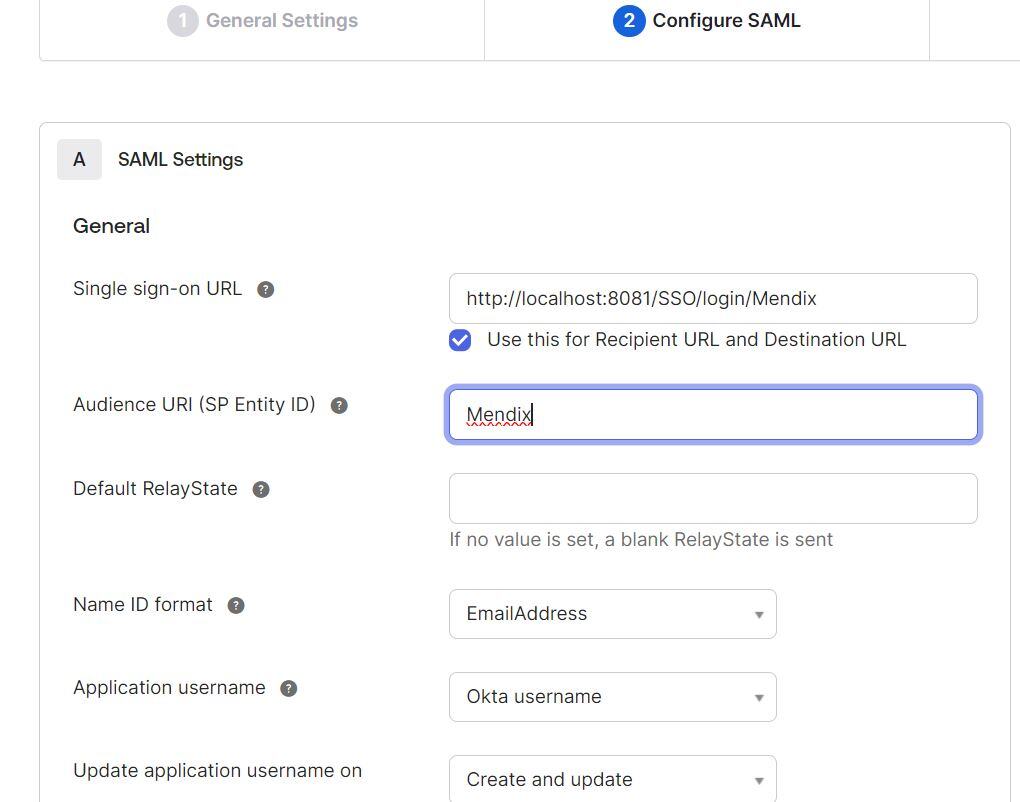
(Note: In the “Single sign-on URL” place, the URL should be ‘http://localhost:8081/SSO/login/Mendix’. The “Mendix” displayed in the URL is the Entity ID given in the SP Configuration.)
Single sign-on URL: The location to send the SAML assertion using a POST operation. This URL is required and serves as the default Assertion Consumer Services (ACS) URL value for the Service Provider (SP). This URL is always used for Identity Provider (IdP) initiated sign-on requests.
The Single sign-on URL cannot contain underscores (_).
Use this for the Recipient URL and the Destination URL is selected by default. This setting uses the same URL for both the recipient and destination URLs. If your integration requires different URLs, clear the checkbox and provide values for the following fields:
- Recipient URL: The location where the app can present the SAML assertion. This is usually the Single Sign-On (SSO) URL.
- Destination URL: The location to send the SAML Response, as defined in the SAML assertion.
Audience URI (SP Entity ID): The intended audience of the SAML assertion. This is usually the Entity ID of your application.
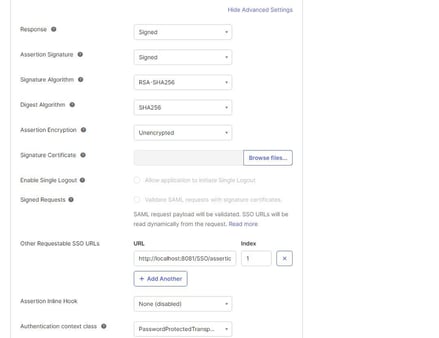
Other Requestable SSO URLs: For use with SP-initiated sign-in flows. Enter the ACS URLs for any other requestable SSO nodes used by your app integration. This option enables applications to choose where to send the SAML Response. Specify a URL and an index that uniquely identifies each ACS URL endpoint.
Some SAML AuthnRequest messages do not specify an index or URL. In these cases, the SAML Response is sent to the ACS specified in the Single sign-on URL field.
When you enable Signed Requests, Okta deletes any previously defined static SSO URLs and reads the SSO URLs from the signed SAML request instead. You cannot have both static SSO URLs and dynamic SSO URLs.
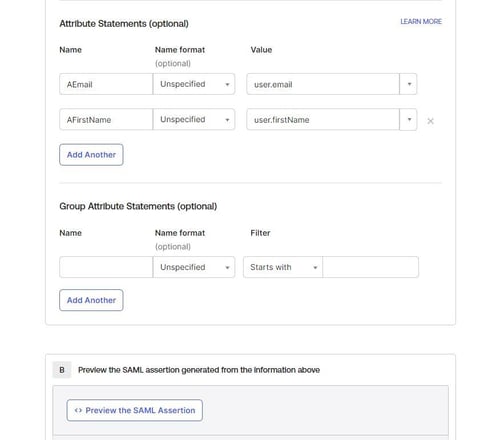
Attribute Statements (optional): Define custom attribute statements for the integration. These statements are inserted into the SAML assertions shared with your app.
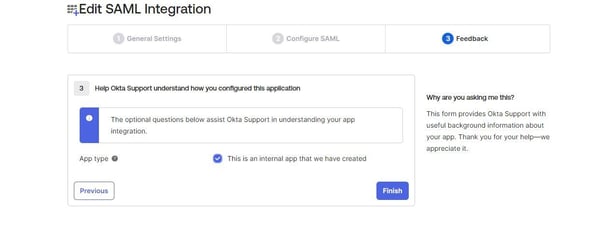
Give the configuration for feedback settings as below.
The app will be created and select the ‘Assignments’ tab. Click the ‘Assign’ drop down and select 'Assign to people'. Click on 'Assign' button on the user and click 'Done'.
Next, in the Sign On tab, we need to use this Metadata URL inside the Mendix application to set up an IdP Configuration within the SAML module. Now let us move on to the Mendix application.
The alias name is important and should be unique. There is no validation in this field, just remember that it should not be duplicated.
Step 10: Let us delve deeper into the Mendix Application for the IdP Configuration.
Alias: The alias for your IdP can be used in the URL of the application to indicate the IdP configuration that should be used during login. The alias must be unique, but you should also make sure that this alias is compatible with usage in a URL (meaning, no /, &, ?, or a special character that could get lost in the communication).
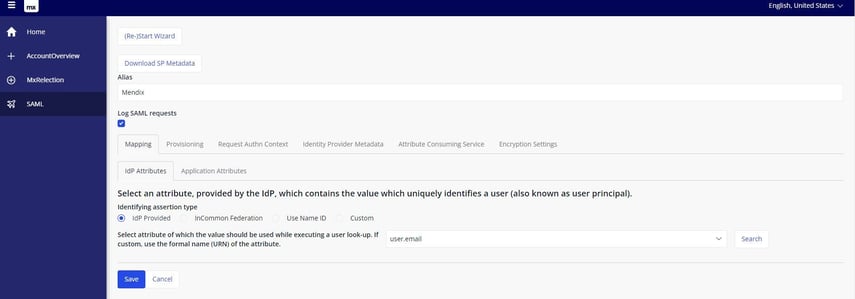
Mapping: There are two tabs within the Mapping tab.
-
IdP Attributes: In this tab, you need to provide the attribute which contains the user name which uniquely identifies the user. This is the 'Identifying assertion type', also known as the “Principal Key”.
- User Entity – The Mendix entity in which you will store and look up the user account. Most often something like ‘Administration.Account’.
- Attribute On – Determines the attribute on which you want to do the lookup. This attribute will be compared against the passed Identifying Assertion.
Note: The IdP attribute and the Application attribute must be same.

Provisioning:
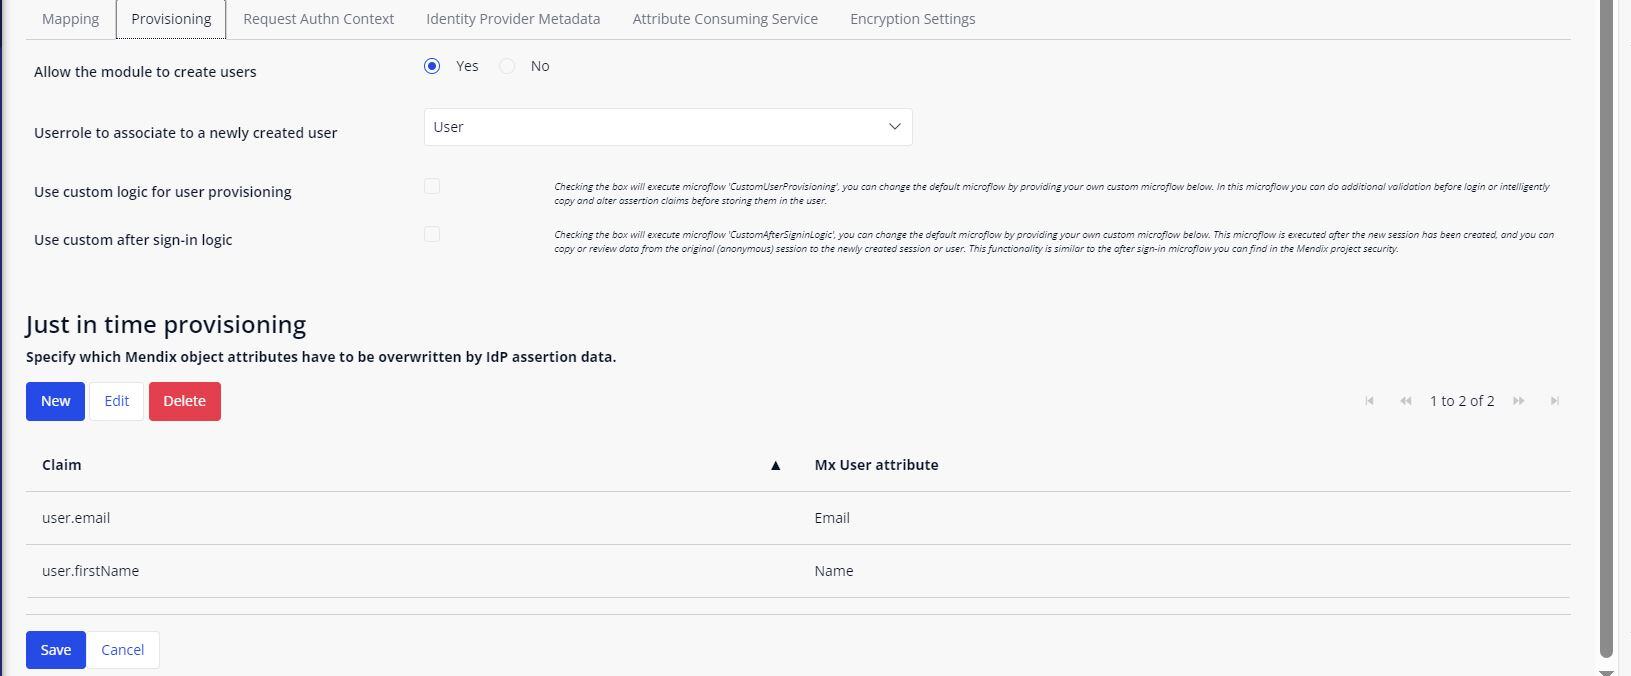
- Allow the Module to Create Users: The module will always search for the user, based on the 'Identifying Assertion'. You can allow the module to create users with a predefined user role. If you allow the module to create users, it will automatically create a new user account if the user cannot be found. If the module is not allowed to create users, it will present a message to the user stating that the login action was successful, but no user has been configured.
- Just in Time Provisioning: During the login process, all fields from the assertions can be copied into the user account entity. All the Claim fields from the assertion will be copied into the selected Mx User Attribute.
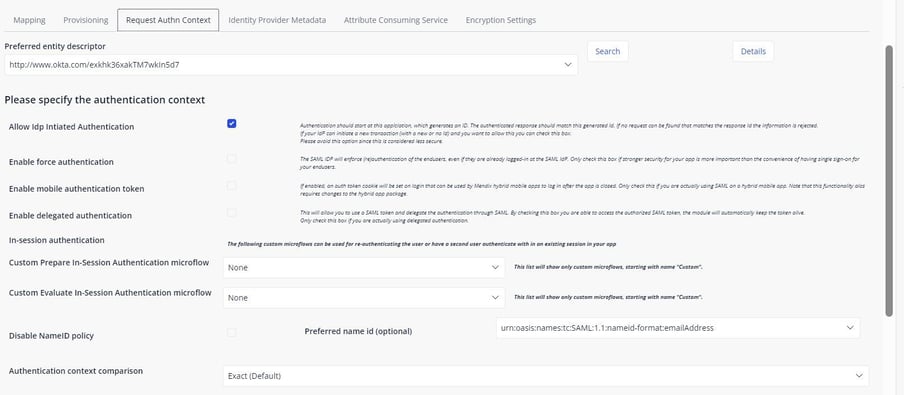
Request Authentication Context:
-
Preferred Name ID: If using a name ID policy, it is mandatory to specify the name ID method. Every IdP is supposed to support transient, but that does not have to guarantee a fixed username. It is up to the IdP and your user provisioning implementation what the best solution is here.
-
Allow IdP Initiated Authentication: By default, the module does not allow unsolicited requests. That means every login has to be initiated from the Mendix application, and all the messages have to be exchanged using the same RequestID and RelayState. Some IdPs do not allow the RelayState to be passed, or the authentication could be initiated by the IdP instead of at the SP. For all situations where the RelayState is not being generated or passed from the original login action at Mendix, this option should be enabled. By default, the SAML module does not allow for unsolicited requests, because that would be considered less secure.
-
Enable Force Authentication: Checking this box will force the SAML IdP to (re)authenticate end-users, even if they are already signed in at the SAML IdP. Only check this box if stronger security for your app is more important than the convenience of having a single sign-on for your end-users.
-
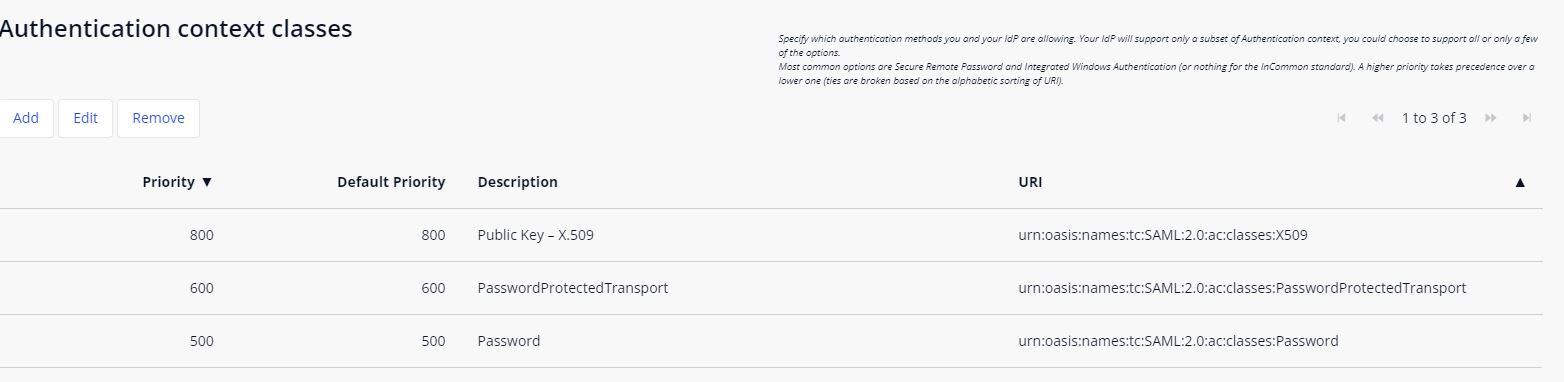
Authentication Context Classes: This passes the allowed authentication methods. This must be whatever the IdP requests, as there are no requirements in this module and all options are available. You should only pass the options which are needed, as passing all options leads to significantly bigger (and slower) message exchange.
Identity Provider Metadata:
-
Response Protocol Binding: By default, the SAML SSO module uses POST_BINDING for the SAML response. In most cases (for example, when using Azure AD), you will want to stick to this default. Some IdPs, however, require your app to use the more secure ARTIFACT_BINDING. To use artifact binding, select the ARTIFACT_BINDING option for Response protocol binding.
This configuration helps enable the Post/Artifact binding, as detailed below:
-
Protocol Binding attribute in Auth-request.
-
AssertionConsumerService binding in SP-Metadata.
Using artifact binding for SAML responses at the SAML IdP is only available in the following versions of the module (depending on which Mendix version you are using).
(Note: After setting the configuration, ensure that the status changes to 'YES' by clicking the Toggle Active button.)
Step 11: Open the Okta developer account and click on “My end user dashboard” which is available in the top bar.
Click on the app, which you have created and the Mendix app will be opened.
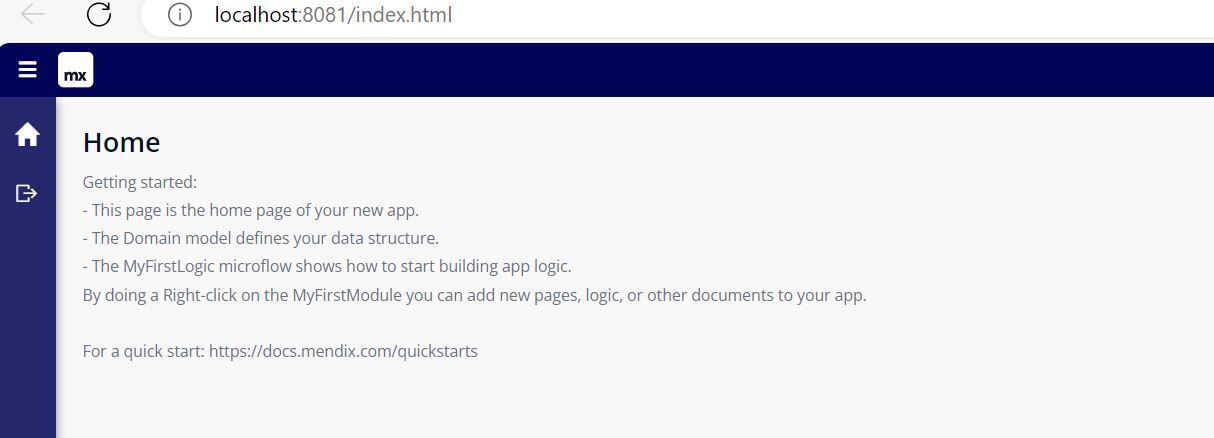
We can also crosscheck whether we have successfully logged into the Mendix app.
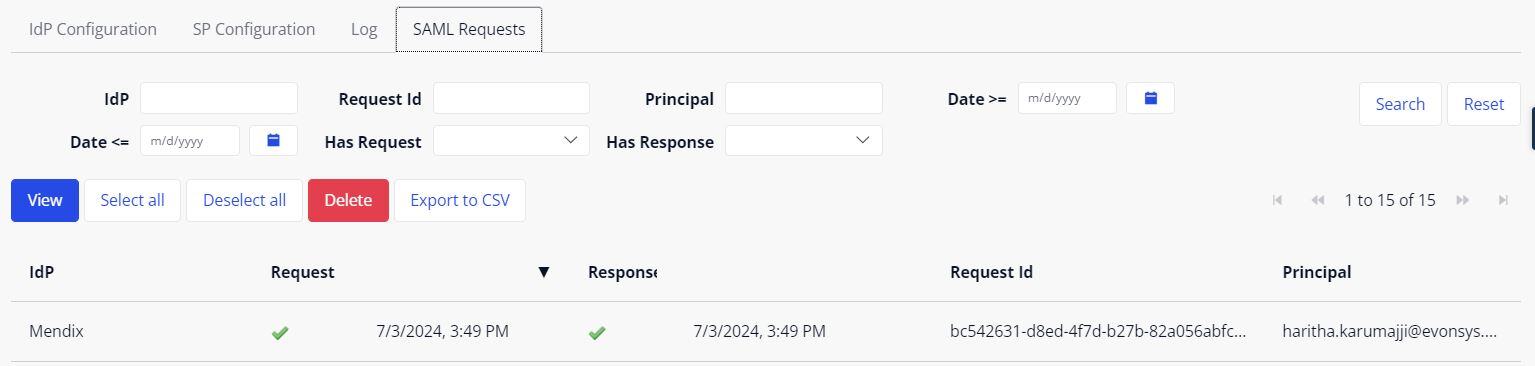
The user account will be automatically created on the account overview page.
What are the advantages of Okta SSO integration?
-
It reduces password fatigue.
-
It prevents shadow IT.
-
It merges with Risk-Based Authentication (RBA).
-
It increases software adoption rates.
-
SSO improves security capabilities.
-
Streamlined access to tools and apps, that increase the productivity.
-
Okta SSO increases employee and IT productivity.
-
Extensibility for rapidly growing businesses.
Conclusion:
Integrating Okta SSO into Mendix allows for centralized user authentication, providing a single sign-on experience across various applications within the Mendix ecosystem. This integration enhances security by enforcing consistent access policies and reducing the risk of unauthorized access. It also simplifies user management for administrators, ensuring efficient provisioning and de-provisioning of user accounts. Overall, Okta SSO in Mendix improves both security posture and user convenience.
Read more:
