Mendix
Cloud Connection: Mendix Files to Google Drive
Discover how to seamlessly integrate Mendix applications with Google Drive for efficient file management. This guide provides step-by-step...
Discover how to integrate Jira with Mendix to streamline workflows, improve collaboration, and optimize project tracking. A step-by-step guide to connecting Jira's agile project management capabilities with Mendix's rapid application development platform for better efficiency and transparency.

Objective: The objective of this guide is to provide a comprehensive and practical approach to integrating Jira with Mendix, enabling enhanced project management capabilities. This integration aims to streamline workflows, improve team collaboration, and optimize project tracking and reporting.
Jira: Jira is a project management tool developed by Atlassian that is widely used for issue tracking and agile project management. It helps teams plan, track, and manage software development projects and other tasks. Here are some key features and components of Jira:
Why does software development need Jira?
Jira is widely used in software development for several compelling reasons. It is a robust project management tool that provides essential features and benefits, making it an integral part of many software development processes. Here are the primary reasons why Jira is needed in software development:
1. Issue and Bug Tracking:
Centralized Tracking: Jira allows teams to track bugs, issues, and tasks in a centralized system, making it easier to manage and resolve them efficiently.
Detailed Reporting: Developers can log detailed bug reports, including steps to reproduce, severity, and priority, helping teams address issues effectively.
2. Agile Project Management:
Supports Agile Methodologies: Jira supports Scrum, Kanban, and other agile methodologies, enabling teams to plan, track, and manage agile projects.
Sprint Planning: Teams can plan sprints, manage backlogs, and set sprint goals, ensuring organized and focused development cycles.
Kanban Boards: Jira's Kanban boards help visualize workflow, manage work-in-progress limits, and ensure continuous delivery.
3. Customization and Flexibility:
Custom Workflows: Jira allows teams to create custom workflows to match their specific development processes, ensuring that tasks flow smoothly from start to finish.
Custom Fields and Screens: Teams can add custom fields and screens to capture the unique data they need for their projects.
4. Collaboration and Communication:
Team Collaboration: Jira facilitates communication and collaboration among team members through comments, mentions, and notifications.
Integration with Other Tools: Jira integrates with various development tools like Confluence, Bitbucket, GitHub, and Slack, enhancing collaboration and streamlining workflows.
5. Project Tracking and Reporting:
Real-Time Insights: Jira provides real-time insights into project progress, helping teams monitor their performance and make data-driven decisions.
Comprehensive Reports: Teams can generate various reports, such as burndown charts, velocity charts, and sprint reports, to track progress and identify areas for improvement.
6. Scalability:
Supports Large Teams: Jira is scalable and can support large development teams and complex projects, making it suitable for both small startups and large enterprises.
Project Management at Scale: It enables the management of multiple projects and teams within a single platform, providing a cohesive view of all ongoing work.
Projects: A project is a collection of issues. It can represent anything from a software development project to a helpdesk ticket system.
Issues: The fundamental building block of a project. Issues can represent tasks, bugs, user stories, and more.
Boards: Visual representations of your workflow. Scrum and Kanban boards help teams track work progress.
Sprints: Time-boxed periods during which specific work must be completed and ready for review (used in Scrum).
Epics and Stories: Epics are large bodies of work that can be broken down into smaller tasks or stories.
The following are the most used scenarios In Jira platform.
Software Development: Track bugs, feature requests, and tasks. Plan sprints and releases.
Project Management: Plan, assign, and track project tasks. Visualize progress with boards and reports.
Service Desk: Manage and resolve customer support tickets.
Business Process Management: Automate and streamline business workflows.
1.Create a Jira cloud platform developer account
2.Create user stories in Jira Software cloud
3.Generate an Access Token
4.Configure the Jira software cloud platform with Mendix developer Portal
5.Import the stories from Jira to Mendix
Step 1: Create a Jira cloud platform developer account
To create a Jira cloud platform developer account, go to the following link https://www.atlassian.com/try/cloud/signup?bundle=jira-software&edition=free, enter your email ID and click the Signup button.
Once you click on the Sign-up button, the OTP will be sent to your email ID copy the OTP from your email and use it in Signup.
After entering the OTP click on the Submit button it will go to the Account details page here you can add your Full name and set the password for your account.

4. Click on Continue then the following page will open.
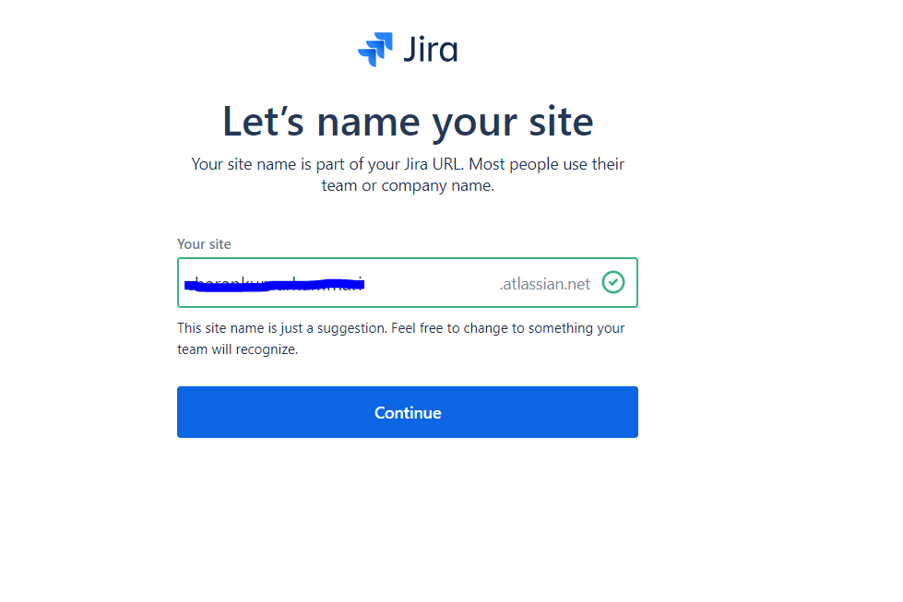
Here you can add the Site name of your Jira platform click on continue after adding the site name.
After clicking on the continue button it asks what kind of work do you do in Jira? Because Jira provides different usage scenarios to the users to work.

Choose software development option and click Continue and then choose the template for the Jira portal and click on continue.
After clicking on continue button, it will open the Jira cloud platform dashboard page here you can create a new project.

Step 2: Create user stories in Jira software cloud
1. Click on the Projects drop-down in top menu and select Create Project option.
2. Once you select the Create project it will open the Project template page choose software development in the left side navigation.
Note: Jira offers several project templates to help teams get set up quickly using projects to specific teams or use cases. These templates include pre-configured issue types, workflows, and other relevant features. Two of the most popular templates are the Kanban and Scrum templates.
Scrum and Kanban are both popular frameworks used to implement Agile methodologies, but they have distinct principles and practices.
When to use Scrum:
When the project has a clear scope but requires flexibility in execution.
When you have a dedicated team that can commit to sprint cycles.
For teams that benefit from structured roles and regular ceremonies.
When to use Kanban:
When you need a more flexible approach without fixed-length iterations.
When you want to improve existing processes without making significant changes to roles and responsibilities.
For teams that need to handle incoming work continuously and manage flow efficiently.
Additionally, Jira provides three more templates for Project management that are Top-level Planning, Cross Team Planning and Bug Tracking.
Now coming to the Process of creating user stories choose the Scrum Template and click on Use template it asks for the project type.

4. Choose "Select a team-managed project" and add a project detail in the next page.

Add a Name and it will automatically generate the key (*Note: Keep the key value somewhere because the key is needed while setting up the configuration for Jira with Mendix).
Click on Next and Now it creates the project with Board.
In the Board it will automatically create a Sprint. If you want to add more sprints you can add, to add the stories click on the Backlog option in the left-side navigation.

From the above diagram the Sprint name is EV Sprint 1, here we can add the different stories based on the issue types.
The Issue types are like Tasks, Bug ... If you want to add more issues you can customize it and add more issues based on the requirements.
You can add the different stories like as shown in below by default every story is To-Do status at first and you can assign each story to a different person as per the requirement.
After adding all stories click on Start print Option it opens the following pop-up page.

Select the duration (Usually it is 2 weeks) in the pop-up page based on the duration the start and end date will automatically be filled, add the sprint goal and click the Start button.
Once you click on the Start button, the Sprint is started, and stories will be visible on the Board in the TO DO section.

Jira Provides a customizable workflow so if you want to add more columns to the board you can add based on the requirements. Here it has only 3 columns TO DO, IN Progress and Done.
Based on your Task progress you can change the status of the Tasks.
Now you can add these story points into your application and connect Jira platform with your Mendix application developer portal. For this, you need to generate an access token.
Step 3: Generate an Access Token
Go to the following URL https://id.atlassian.com/login?continue=https%3A%2F%2Fid.atlassian.com%2Fmanage-profile and login with your email ID.

Once you are logged in Go to the Security option and click on Create and manage API tokens on that page.
On the next page Click the Create API Token Button, enter any label name for the Token and click Create now it will create the API Token (Note: Copy the Access Token and Keep it somewhere).
Step 4. Configure the Jira software cloud platform with Mendix developer Portal
Create an application in Mendix Studio Pro.
Go to Mendix Home and choose the application that you want to connect with Jira.
Go to setting in General section and open the Project management Tab (Note: Only the Scrum master can be able to connect Jira with Mendix) and it looks like the following page.

4. Click on Connect Jira Button then the following pop-up page will open.

Base URL Jira Environment: Copy the URL from the browser of your Project dashboard it looks like
“https://evon2k22.atlassian.net/Jira/software/projects/EV/boards/2“.
Remove words after .net then the remaining will be the base URL for the Jira Environment.
Project Key: The key which is generated while creating the project (Refer Step 2 Point no 5) and you can get the Project key from the Base URL also (EV is the Project Key as for the above URL).
Jira Account: Your Jira account email id.
API Token: The token which is already generated at Step 3.
6. After filling in all the details on the configuration page click Next button and select the Project sprint board that you have created in the Jira project dashboard.

Click on Activate once you click on Activate it automatically connects your Mendix application to Jira cloud Platform and you can see the Connected Jira Board option in Mendix Developer Portal.
Before Connect to Jira
After Connecting to Jira

After connecting to Jira, you can directly redirect to the Jira platform by clicking the Jira Board option in Mendix developer portal.
Now open your application in local and add the stories tab to the console if it is not available.
Click on stories and click refresh button then it will retrieve all the stories that are created in Jira platform.
Before connecting Mendix with Jira

After connecting Mendix with Jira

One of the best things about Jira integration with Mendix is you can change the status of the story from your local environment Mendix console, it will automatically update in the Jira platform.
If you add any new workflow in the Jira project dashboard you need to reconnect with Mendix to get the updated workflows in your local environment.
Now you can be able to use the features of Jira with Mendix application development.
Integrating Jira with Mendix provides a powerful synergy that enhances project management and development workflows. By connecting Jira's robust issue-tracking and agile project management capabilities with Mendix's rapid application development platform, teams can achieve greater efficiency, transparency, and collaboration.
Read more:
To know more about the Mendix applications click on the following link, Welcome to Mendix Docs | Mendix Documentation
To know more about the Jira platform, click on the following Link Jira Software Documentation | Atlassian Support | Atlassian Documentation

Discover how to seamlessly integrate Mendix applications with Google Drive for efficient file management. This guide provides step-by-step...
Discover how Mendix templates streamline application development with pre-configured components, UI layouts, and business logic. Learn about their...
This latest guide explains how to seamlessly integrate Mendix data with Tableau dashboards. It also outlines step-by-step techniques for enhancing...