In today's digital era, businesses must embrace efficient payment solutions to enhance customer satisfaction and streamline transaction processes. Paytm, India's leading digital wallet and payment service provider, offers a robust platform for secure and convenient payments.
In this blog, let us discover how integrating Paytm into your Mendix applications can revolutionize your payment processes, providing your customers with seamless and hassle-free transactions.
What is Paytm?
Paytm is India's leading digital wallet and payment service provider, offering a secure and convenient platform for users to make payments.
Integrating Paytm into your business can provide a wide range of benefits, including increased customer convenience, improved transaction security,
and simplified payment processing.
Prerequisite to build PayTM integration with Mendix
- We need Mendix Studio Pro.
- Download Community Commons from the Marketplace.
- Eclipse Code Editor.
- Visit the Paytm developer portal: Go to the Paytm developer website, typically https://dashboard.paytm.com/login.
- Create a Merchant account: If you don't have a merchant account, sign up for one on the Paytm developer portal. Provide the required information and complete the registration process.
- Log in to your developer account: Log in using your credentials once you have created an account.
- Access the testing environment: Navigate to the developer portal's Developer Settings > API keys section. This is where you can create and test applications using Paytm's APIs.
- Generate a testing MID: You should find options to generate a testing MID within the testing environment. Follow the instructions provided to create testing MID specific to your needs.
- Obtain the MID Key: Once you have generated the testing MID, you will receive the corresponding MID Key. The MID Key is a unique identifier associated with the MID. Note down or save the MID Key, as it will be required for API integrations.
- Use the testing MID and MID Key: With the testing MID and MID Key, you can now use Paytm's APIs in your testing environment. These credentials will enable you to simulate transactions and test the integration of Paytm's payment services without processing actual transactions.
How To Implement Mendix?
Step 1: Create Constants
Create constants as
Mid Id -’ Test Merchant Id.’
Mid key- ‘Test Merchant Key.’
Step 2:
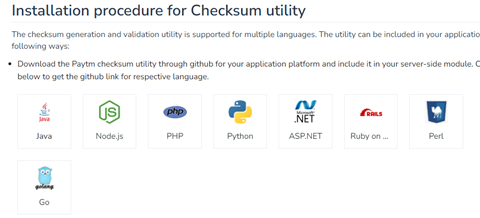
Download the Java Zip file from Checksum Generation and Validation (paytm.com).
Extract the Zip File, and copy PaytmChecksum.jar.
Click on App> Show App Directory in Explorer>userlib and paste it here.
Step 3:
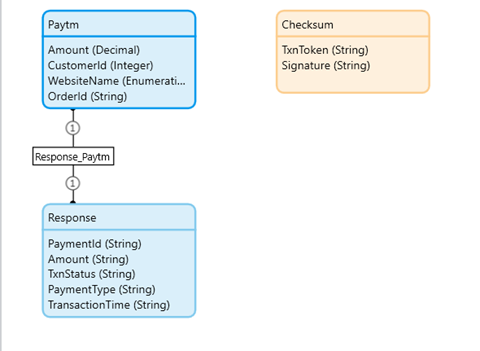
Domain Model: Create a Domain Model like below
Step 4: Create a Java Action.
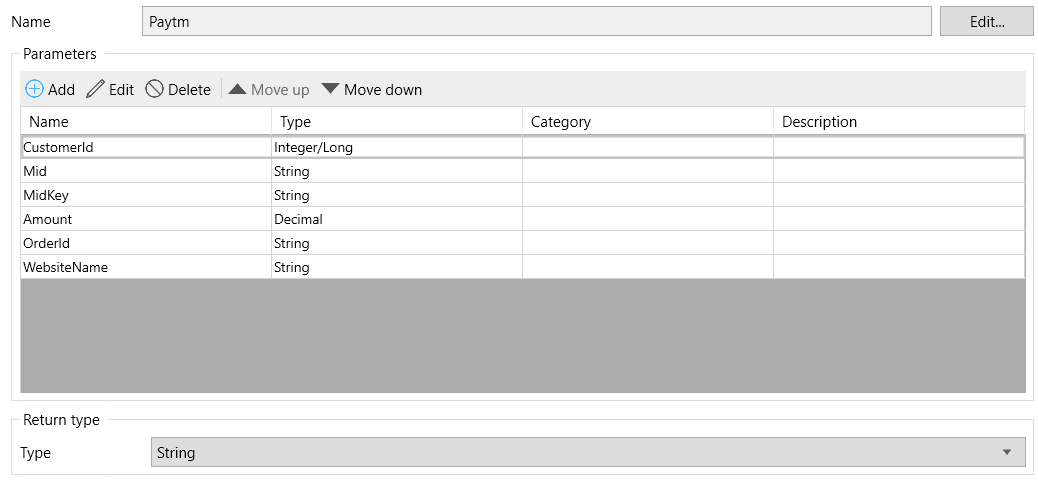
Create one Java action named “Paytm” with a return type as a string.
Click on App> Deploy for Eclipse.
Follow the link if you need help with Open Java action with Eclipse.
Extending Your Application with Custom Java | Mendix Documentation
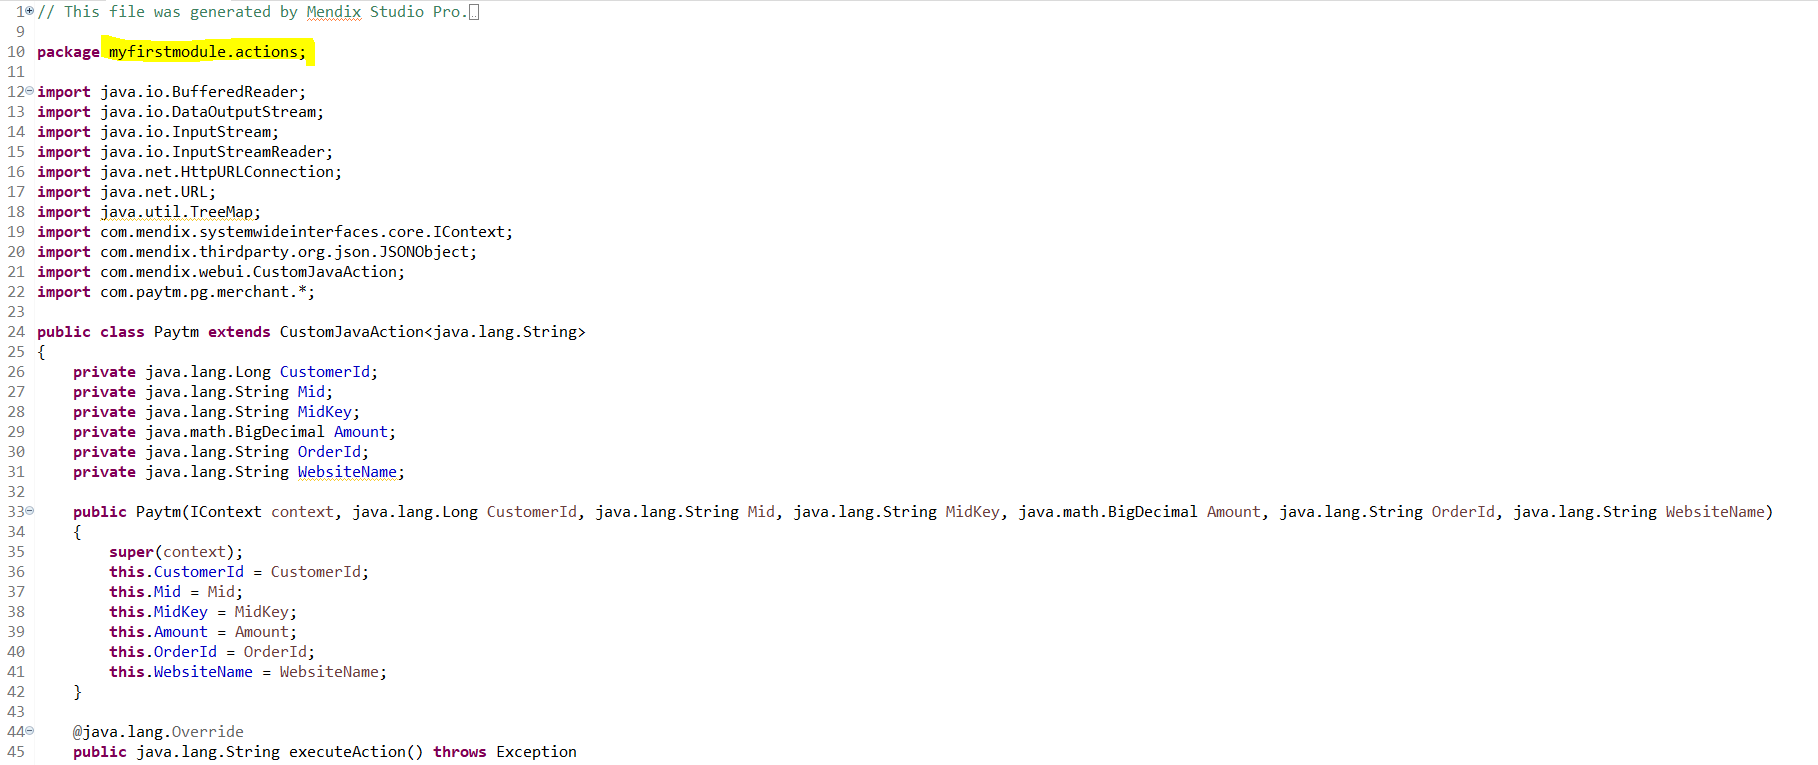
Open Eclipse Editor > Open ‘Your App’> javasource > ‘your Module Name’.actions (example MyFirstModule.actions)>Paytm.java
Copy the Java Code from Below Link
https://drive.google.com/file/d/1vB9B42uk352fuHniYvcnHupagVU3CIue/view?usp=drivesdk
**Note: In case You're using another Module, you need to change the Package name to ‘yourmodulename.’**
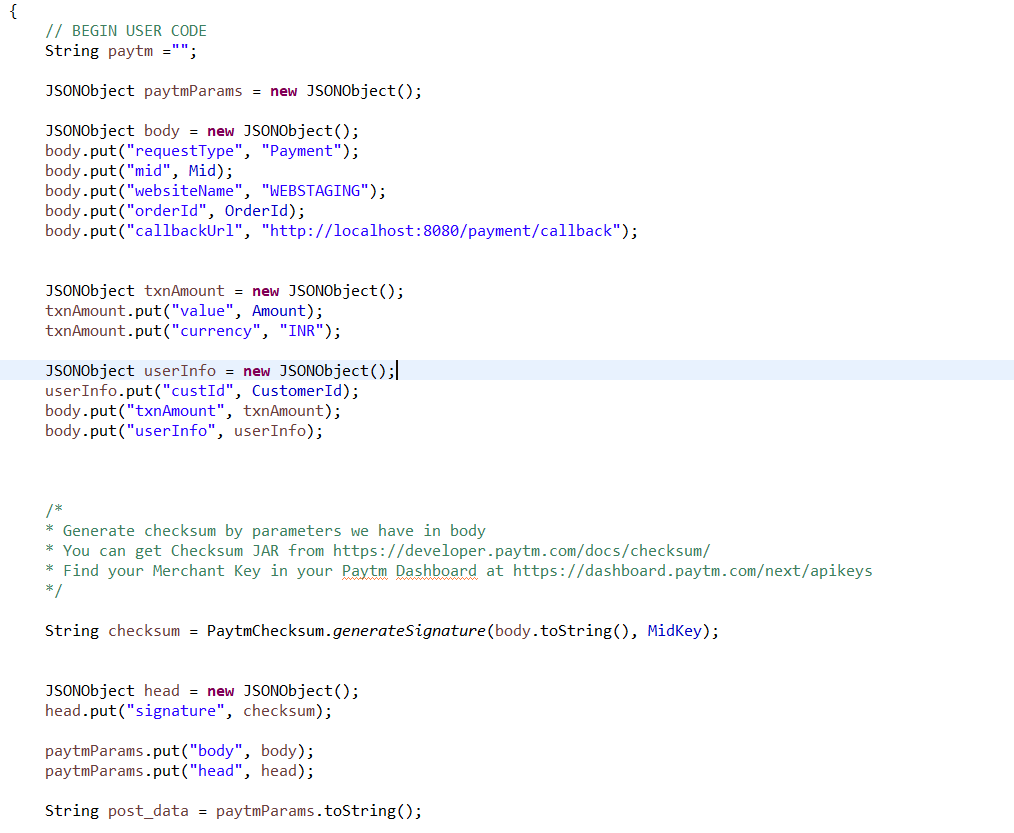
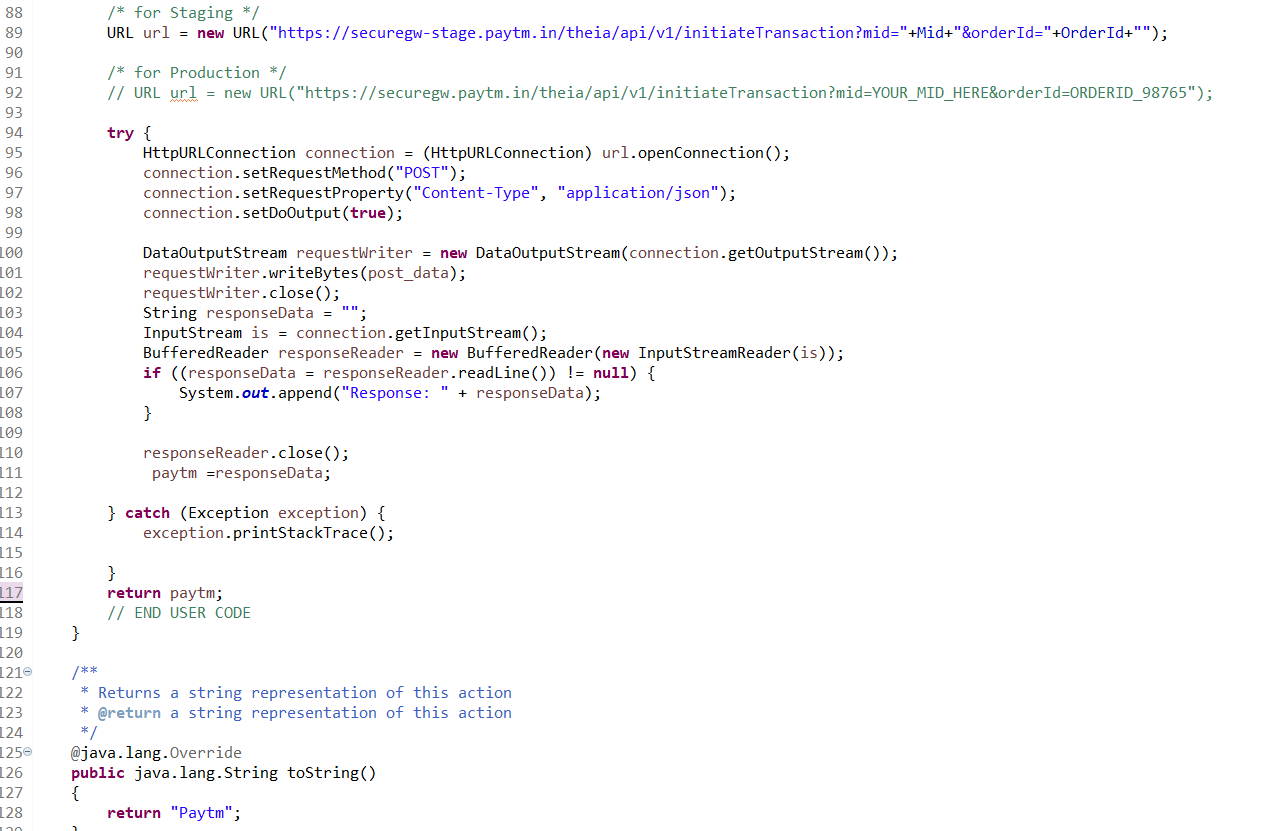
Step 5: Create a JsonStructure & Import Mapping.
Create one JSON Structure Named ‘JSON_Paytm’ using below JSON structure
{"head":{"responseTimestamp":"1680947528565","version":"v1","signature":"umD3Zue5zttNDo6u1/wtbNKnh+T+Xl+SCqva+DFS4pZLSzrxvg2nrjKWYZtLEDuKrrcvWiAjK/SWKW8prCImxuIBGA+tF4uNhMSh6hDkjzg="},"body":{"resultInfo":{"result status":"S," "resultCode":"0000","results":"Success"},"txnToken":"801a51dbc6c34750877058afbe1149bc1680947526200","isPromoCodeValid": false, "authenticated": false}}
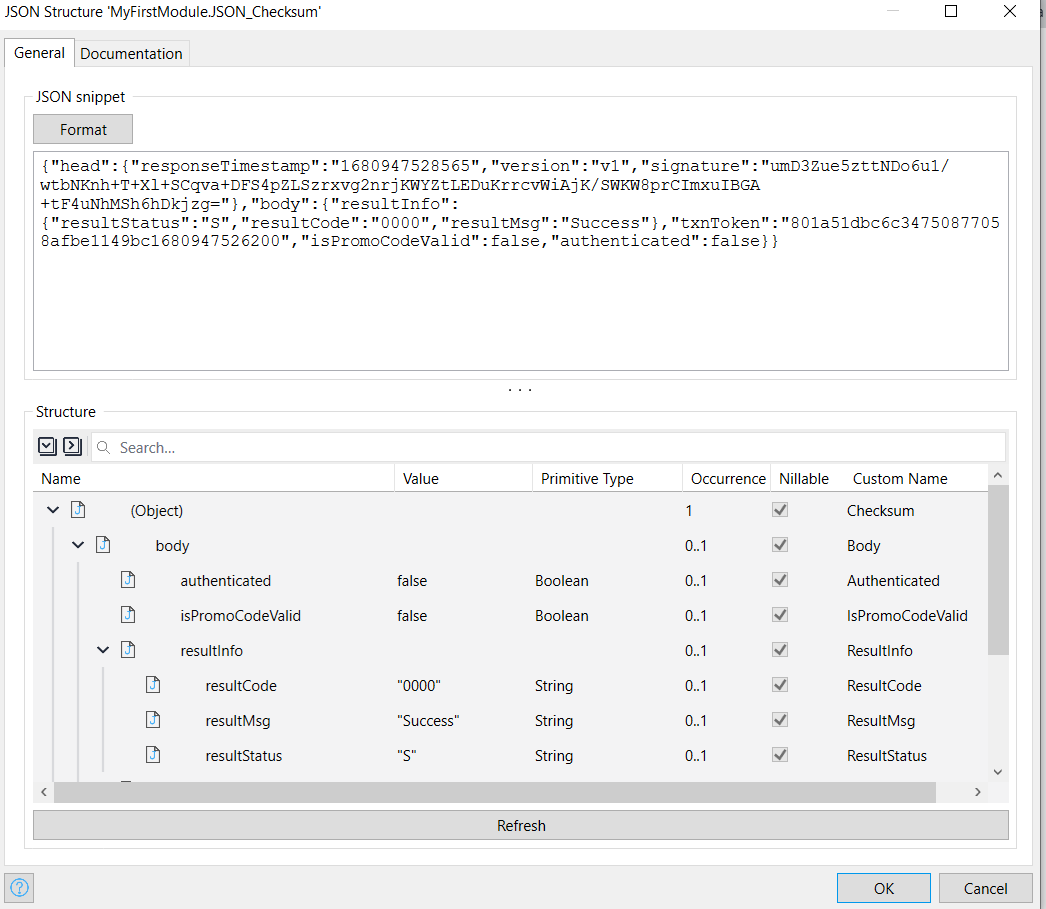
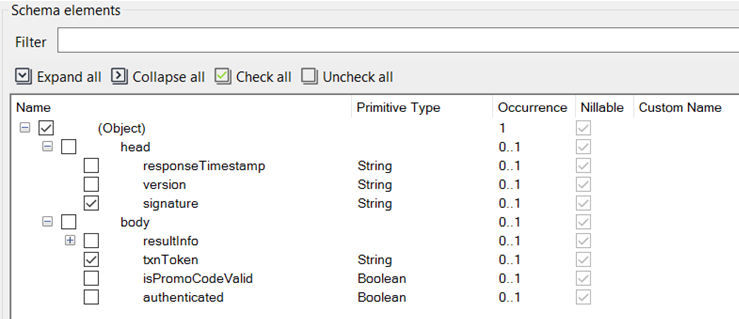
Using the above JSON Structure, create one Import Mapping named ‘IMM_Checksum.’
Schema Source as JSON structure selects as ‘JSON_Paytm.’
Select elements below.
Step 6: Create a Microflow.
Create a microflow name as ‘SUB_JavaactionCall.’
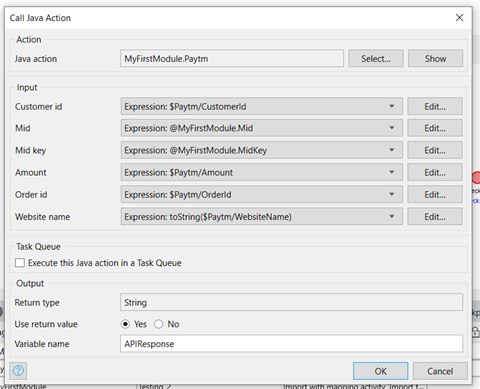
java action call activity from the toolbox and select Paytm Java action, which we created earlier.
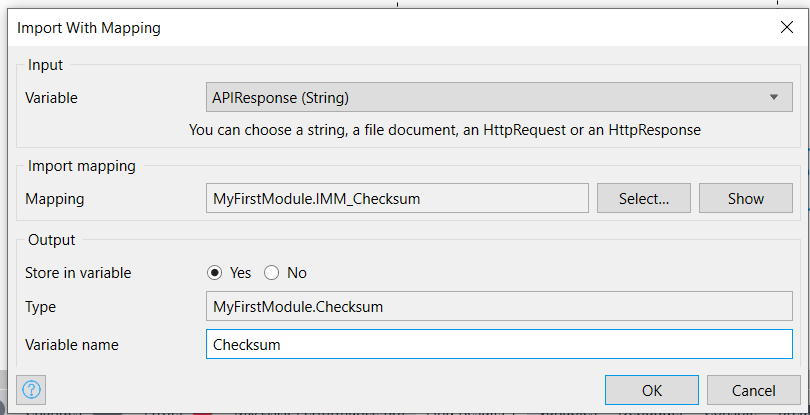
Call import with a mapping activity.
Select Variable as APIResponse, which we get from JavaAction.
Import mapping as IMM_Checksum, which we created earlier.
Store in Variable, yes.
Variable name as ‘Checksum.’
Set $Checksum as Return Value.
Then Finally, Microflow looks like this.
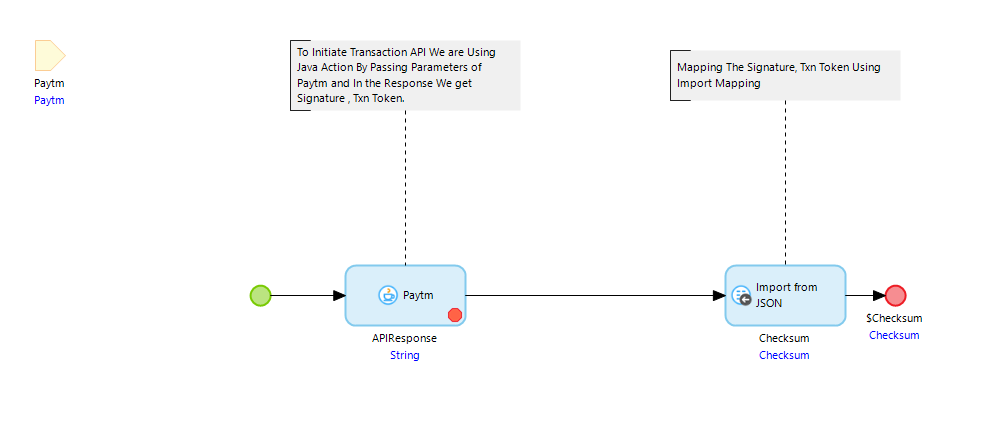
Step 7:
Create Sub Microflow to check mid id, mid key should not be empty.
Microflow Name: Sub_Validate_Mid 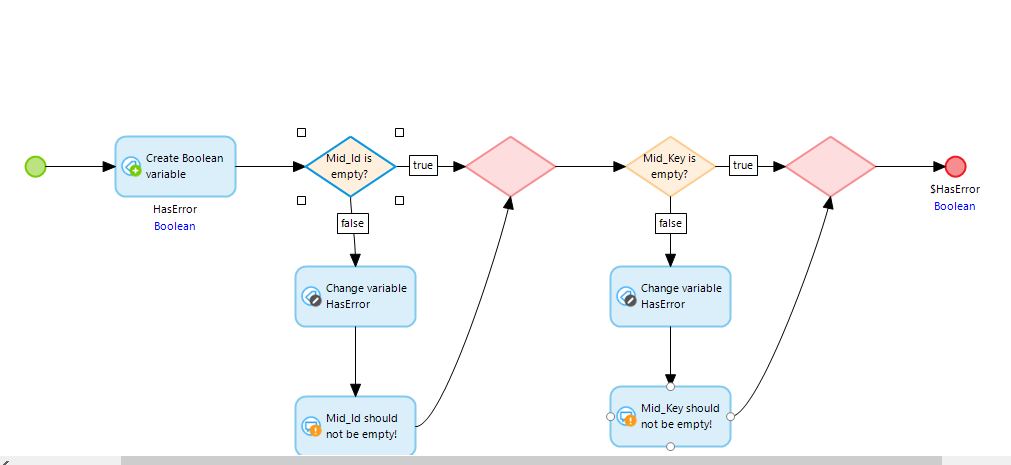
Step 8: Create a nanoflow
Create a nanoflow named ‘ACT_Proceed_Payment’ with the parameter Paytm(Object).
A)Call sub-microflow:
Sub_Validate_Mid & place show progress in nanoflow
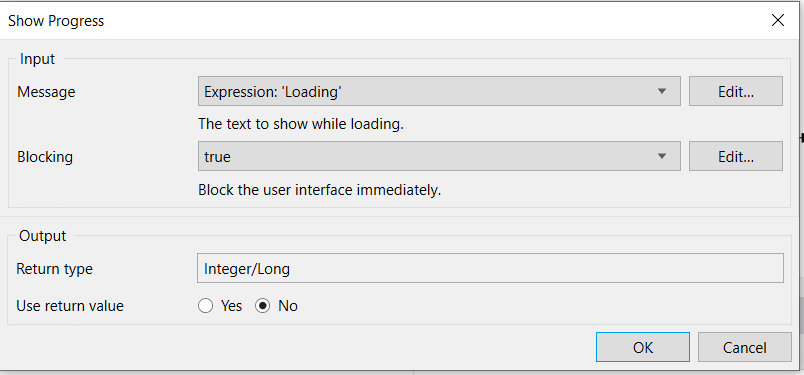
Continuation of nanoflow.
B)Create OrderId:
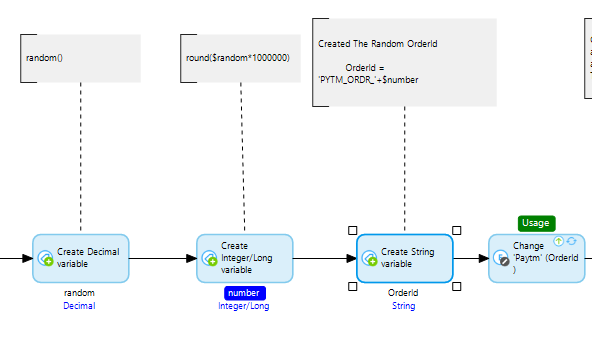
We need some random Order Id, so for that, we need to follow the logic
Create a variable named as random (type Decimal) value as random ().
Create a variable named as number (type Integer/Long) value as round ($random* 1000000).
Create a variable named orderid (type string) value as round ('PYTM_ORDR_'+$number).
Change the object of Paytm member as OrderId value as $orderId.
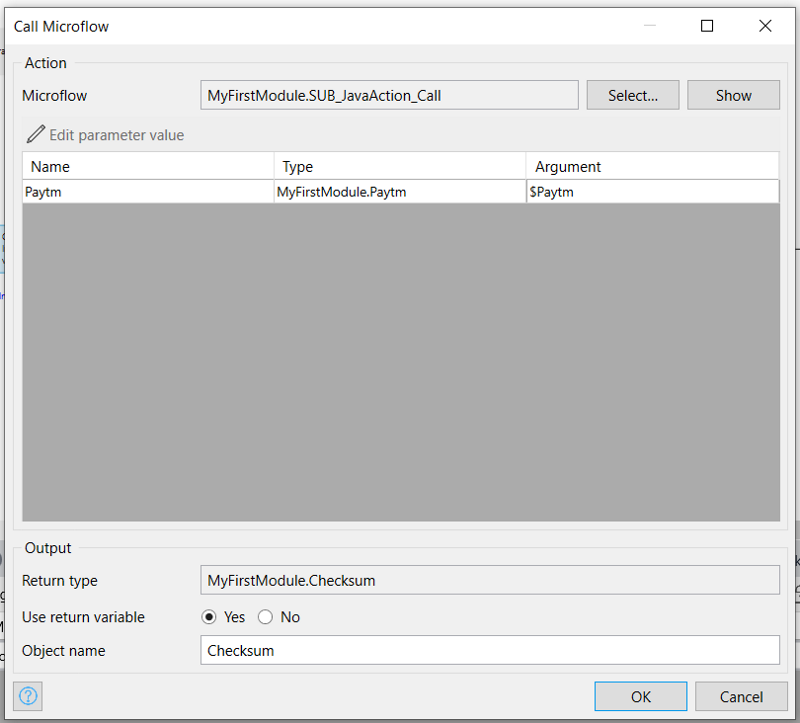
C)Call SUB Microflow:
Drag Microflow call Activity from Toolbox, then select microflow as we created SUB_JavaactionCall. Check the reference below image.
D) Create a Custom JavaScript action
Create a custom JavaScript action named ‘Payment_Gateway.’
Parameters as mid(string),txntoken(string) & orderid(string).
Return type none, Platform all.
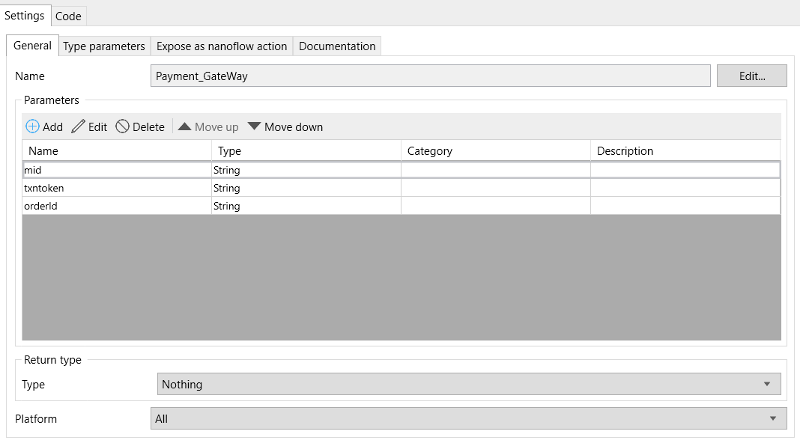
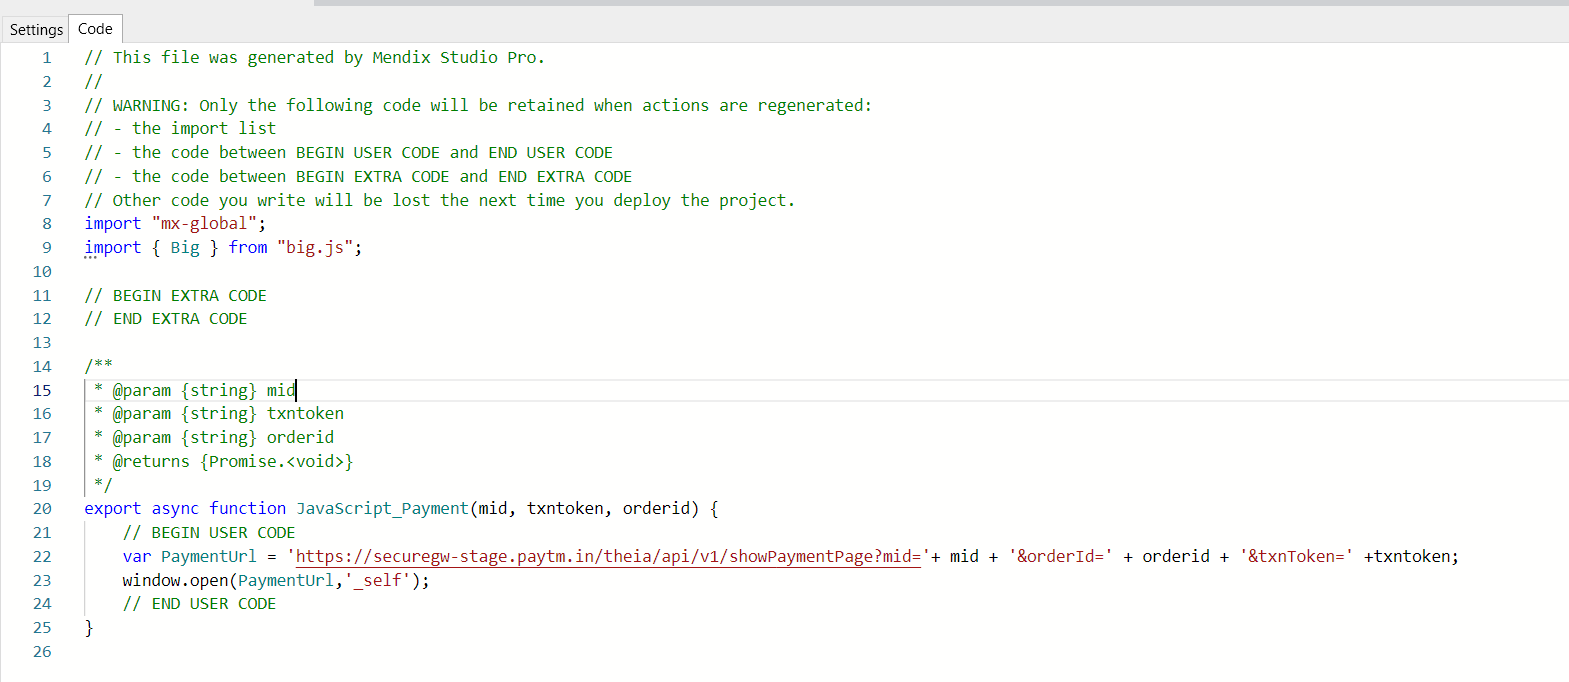
Select the Code tab, then in between //Begin Code & //End Code, place below the code
var PaymentUrl = 'https://securegw-stage.paytm.in/theia/api/v1/showPaymentPage?mid='+ mid + '&orderId=' + orderId + '&txnToken=' +txntoken;
window.open(PaymentUrl,'_self');
It should be like below.
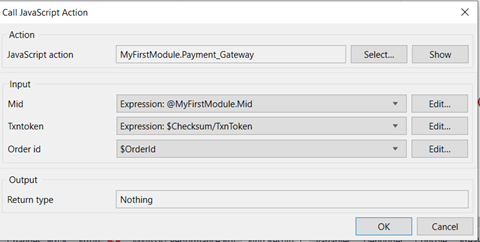
Drag JavaScript action call to nanoflow.
Select JavaScript action as Payment_Gateway, in Input Mid value as @MyfirstModule.Mid, Txntoken value as $Checksum/TxnToken, and Order id value as $OrderId.
Finally, the nanoflow like below

Step 9: Create pages.
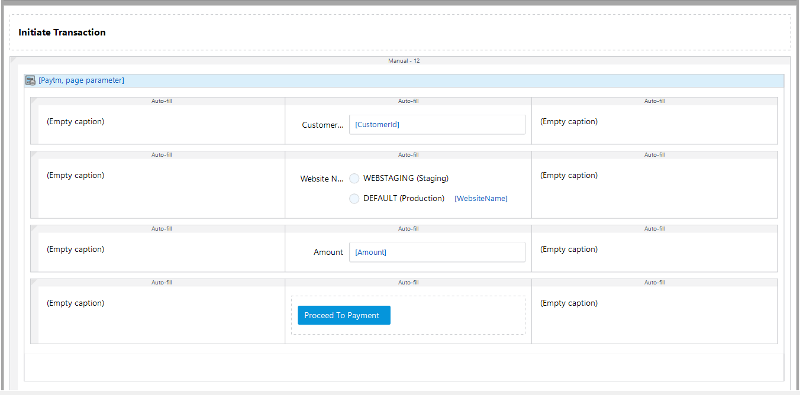
Create a new edit page named ‘Paytm_Newedit.’
Drag the data view from the toolbox and select the entity as Paytm.
Call nanoflow from the toolbox, drag it to the data view & select nanoflow, which we created Earlier.

Finally, the page should be like the one below.
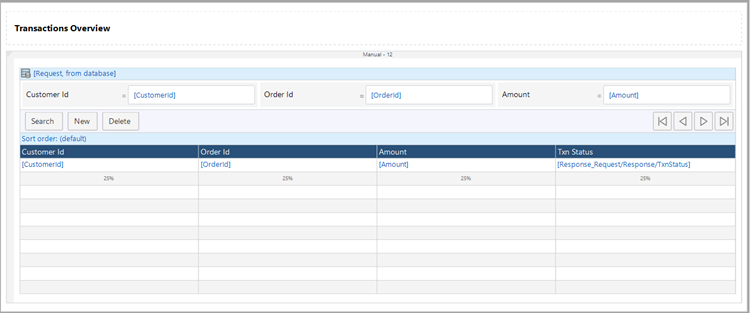
Create an Overview page named Paytm_Overview for a Paytm entity like the one below.
And for the new button, select the page as Paytm_Newedit.
Step 10: Create a Published REST Service
Create one Published REST Service named ‘Paytm CallBack.’
Edit the Location like the below image.

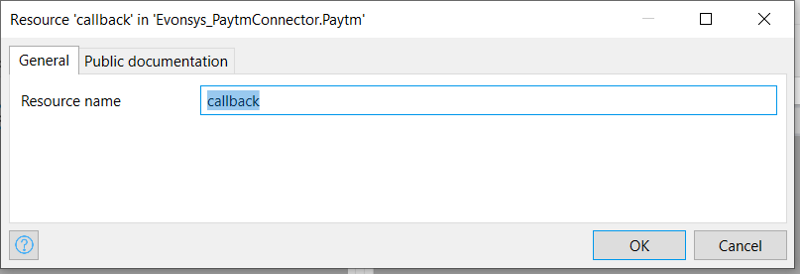
Resources > Add > callback
Operations for resource ‘callback’>Add method POST
like below
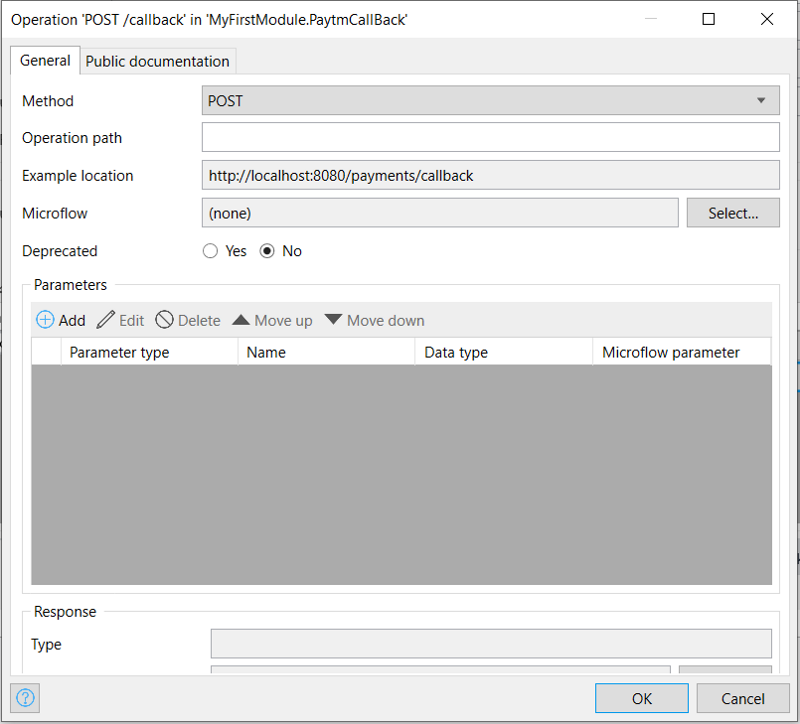
Microflow Select > New
Create one microflow named ‘postcallcabck.’
Take two parameters as objects 1)system.HttpRequest 2)system.HttpResponse.
In between start and end events.
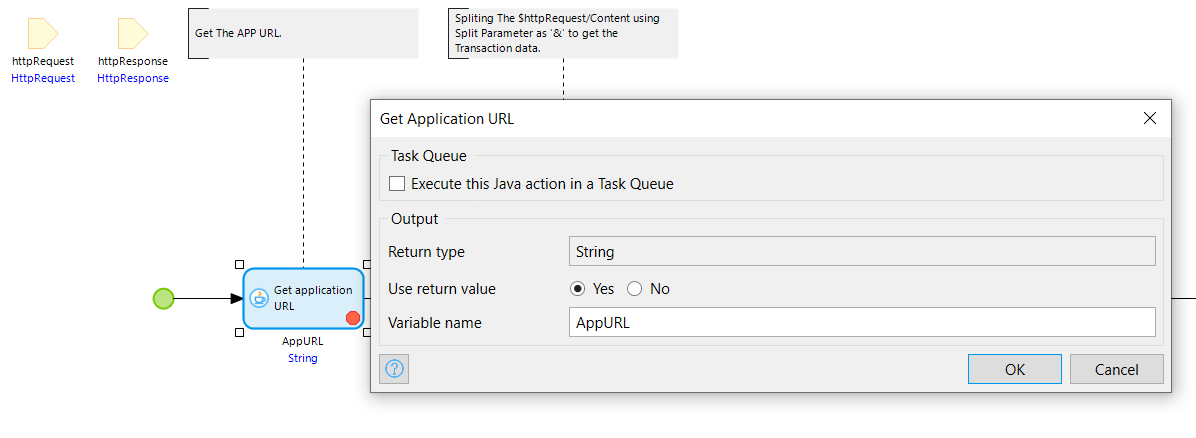
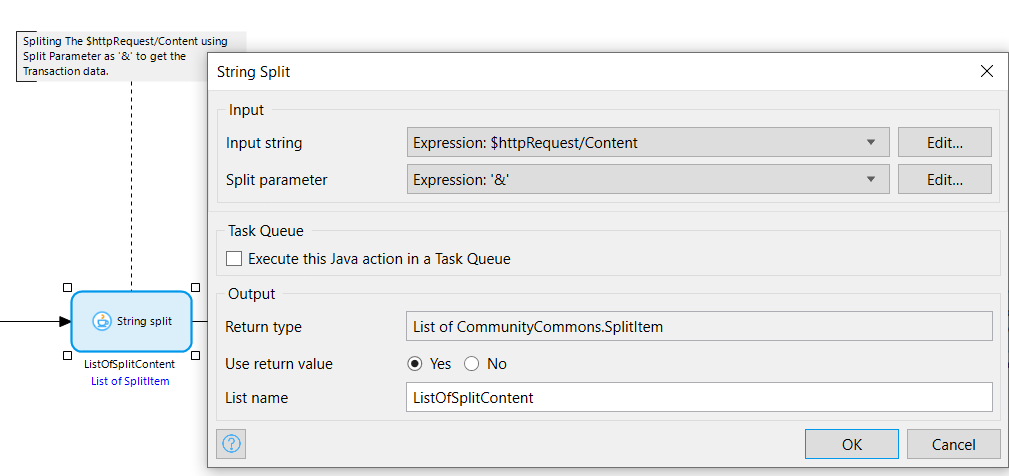
Get Application URL Java action, Split String Java Action, and create five empty string variables named amount, orderid, Status, PaymentType, and TransactionTime.
Application URL:
Split String java action:
Variable:
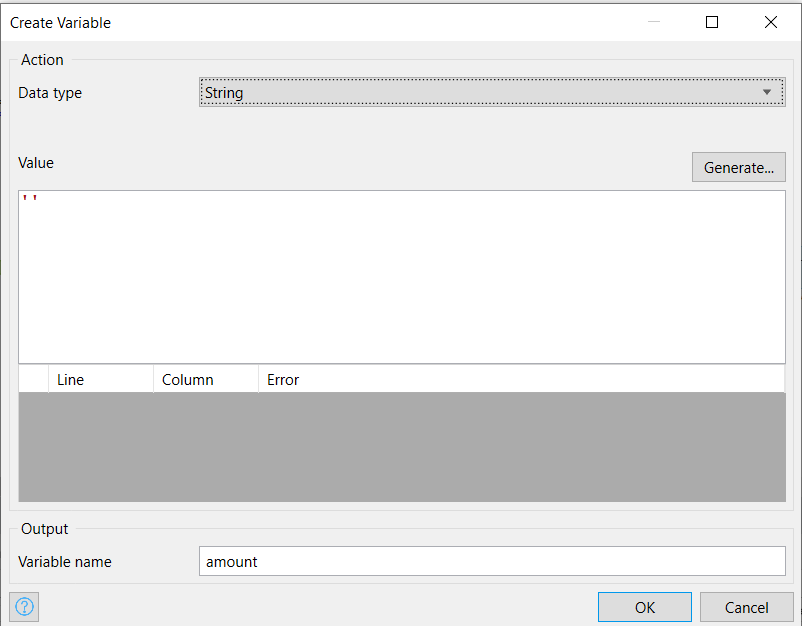
So that you know, repeat this for the other four variables.
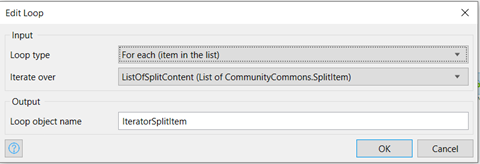
Loop Activity
Input
Loop type: For each, Iterate over ListOfSplitContent(List of CommunityCommons.Splititem).
Output
Loop object name: IteratorSplititem

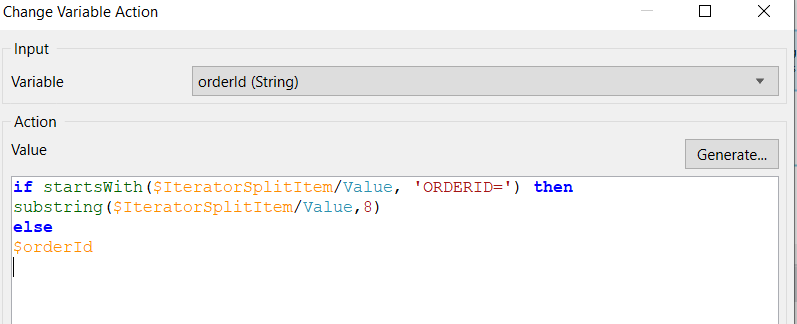
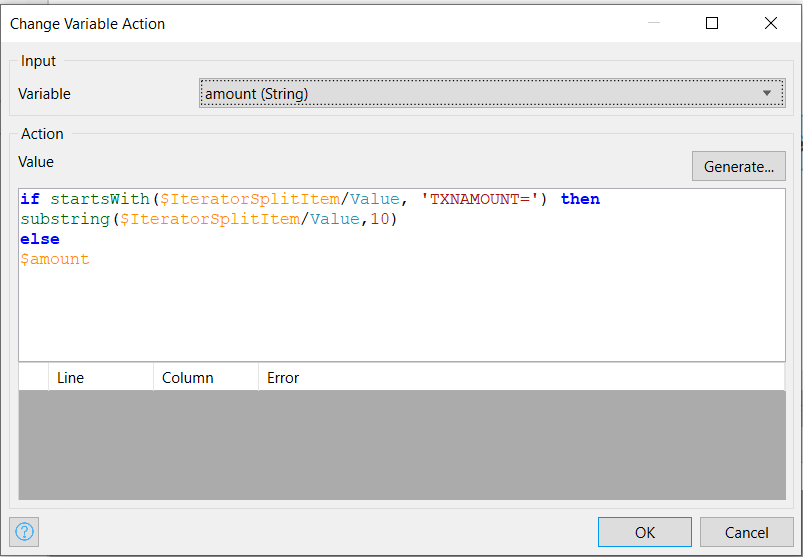


Note: $TransactionTime, we need to format String to get date and time format.
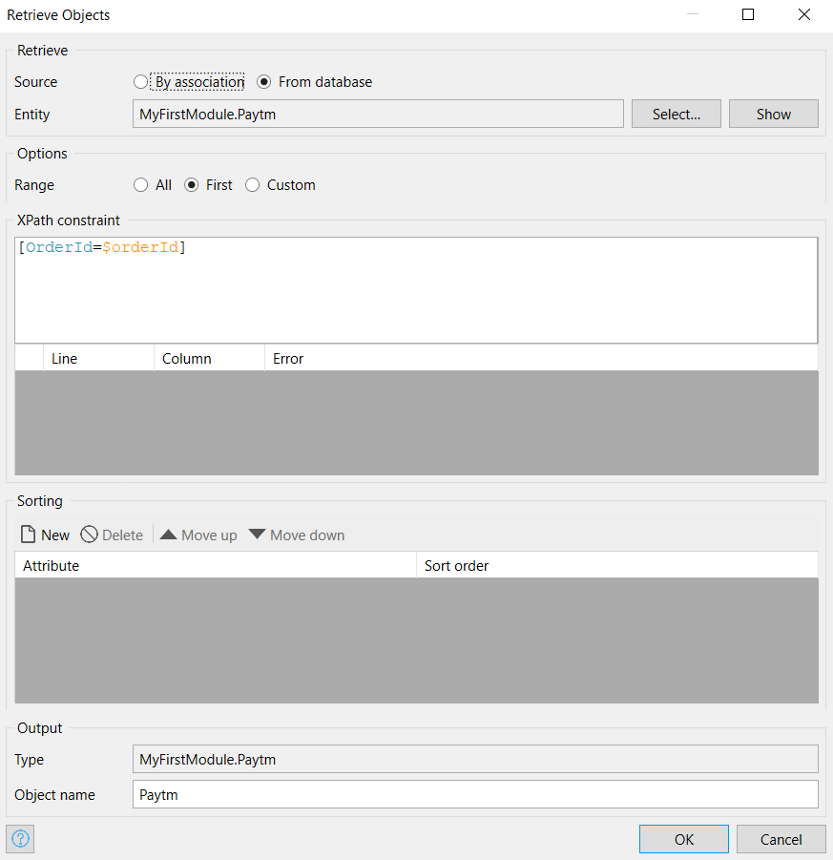
Retrieve Activity:
Retrieve from database Paytm entity
Range(first), In Xpath, constrain : [Orderid = $orderid].
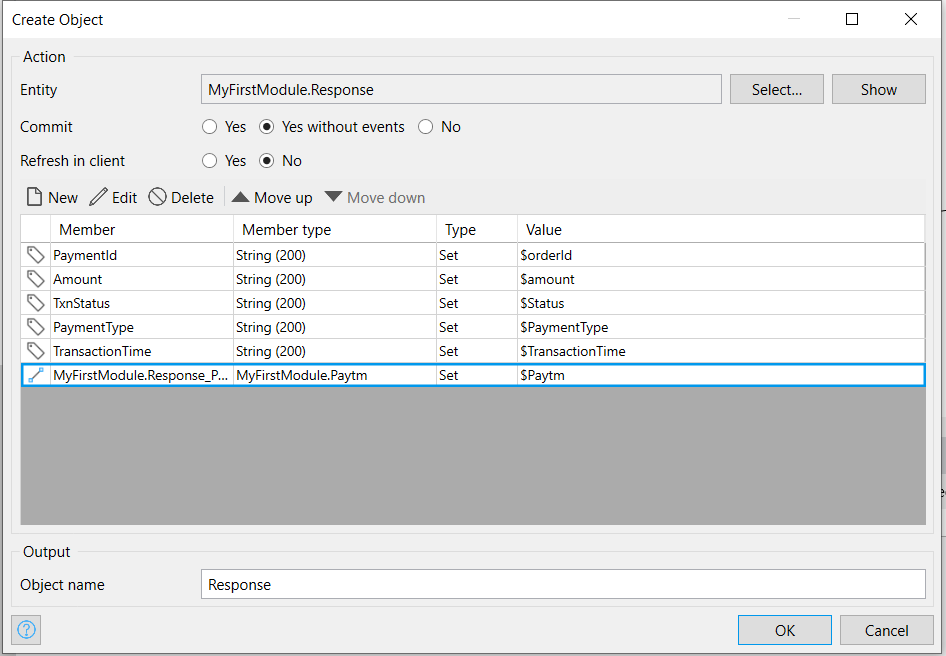
Create Object:(Response)
Create Response Object
Member – Value: PaymentId - $orderid, Amount- $amount, TxnStatus – Status, PaymentType - $ PaymetType, TransactionTime- $TransactionTime, MyFirstModule.Response_Paytm - $Paytm.
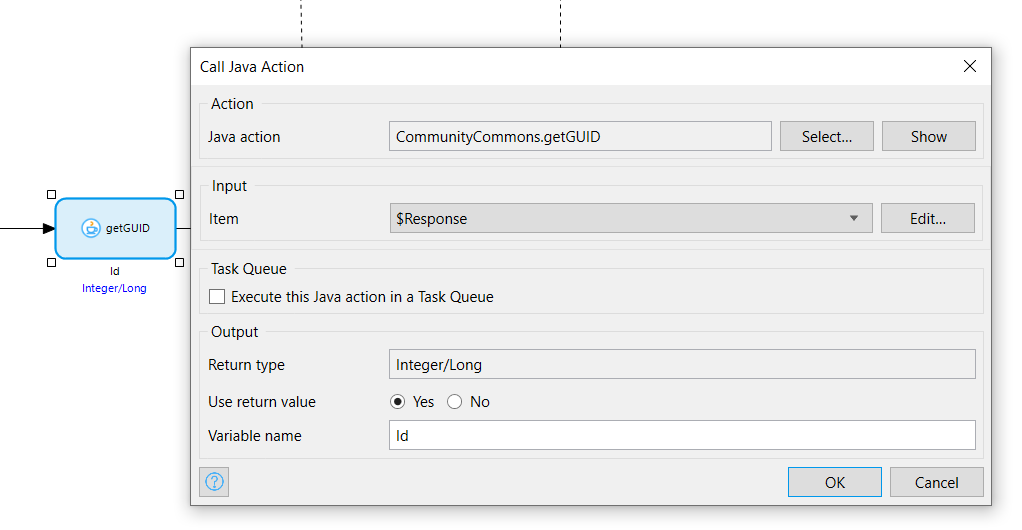
Call getGUID java action.
Input > Item : $Response
Use Return Value: Yes, Variable name: id
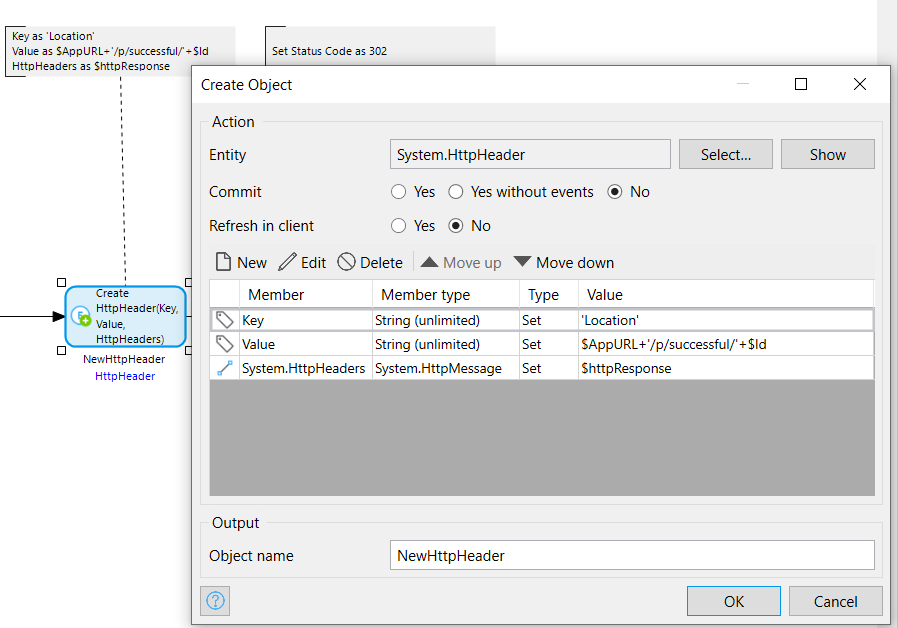
Create Object:(System.HttpHeader)
Create HTTP headers object
Key- 'Location'
Value: $AppURL+'/p/successful/'+$Id
System.HttpHeaders - $httpResponse.
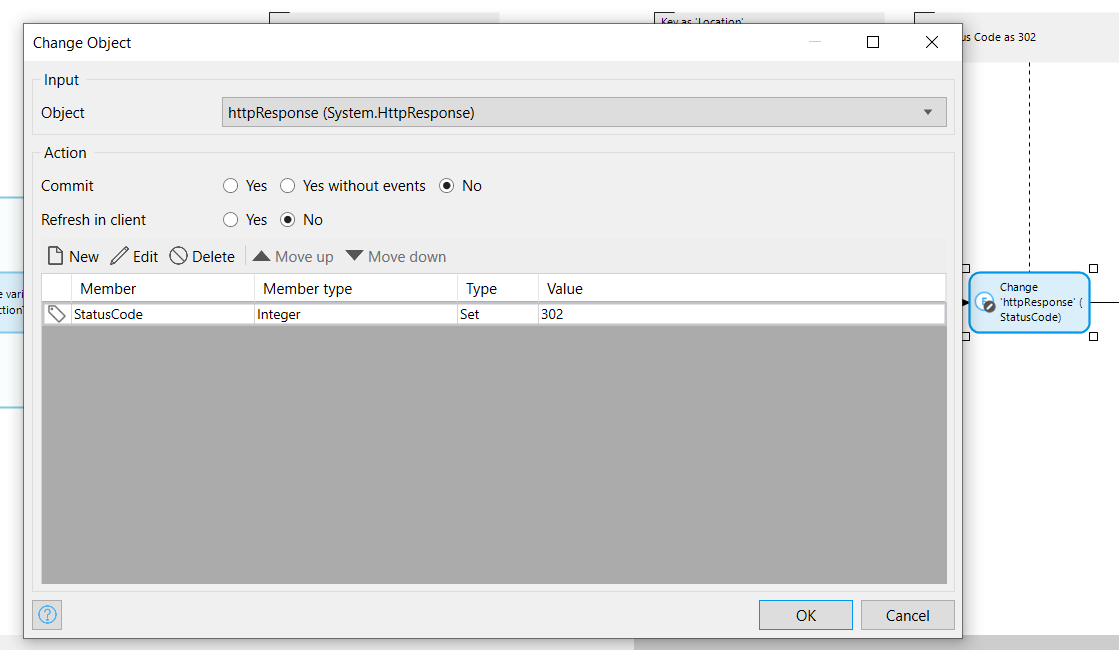
Change Object:(System.HttpResponse)
change System.HttpResponse object
Status – 302
Show page activity
For this, we need to create a page named as Payment_Status.
Could you create a page with a Response entity like the one below?
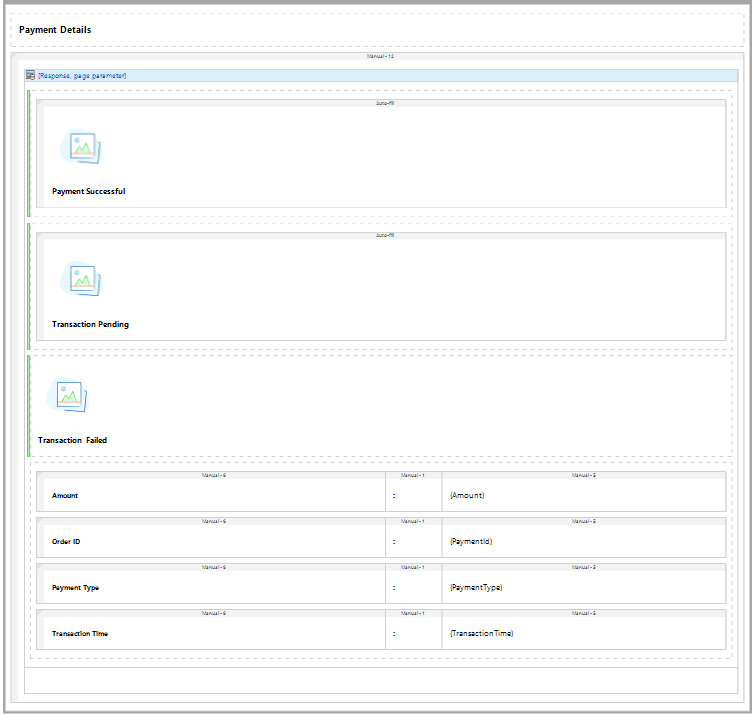
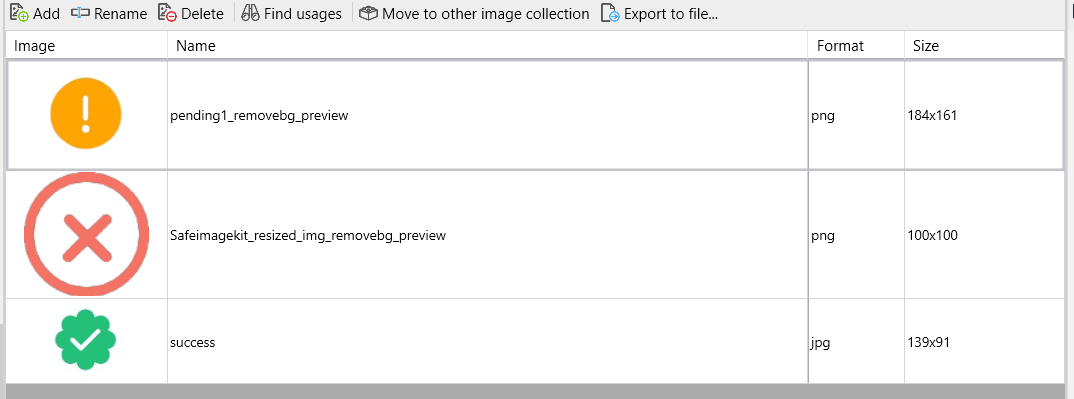
Note: Images should be added in images.
For Payment Successful
Visibility Condition: $currentObject/TxnStatus='TXN_SUCCESS'(Based On Expression).

For Transaction Pending
Visibility Condition : $currentObject/TxnStatus='PENDING'(Based on Expression).

For Transaction Failed:
Visibility Condition: $currentObject/TxnStatus='TXN_FAILURE'(Based On Expression).

Page URL: /successful/{Id}

Select the Page as Payment_Status we created in the show page activity below.
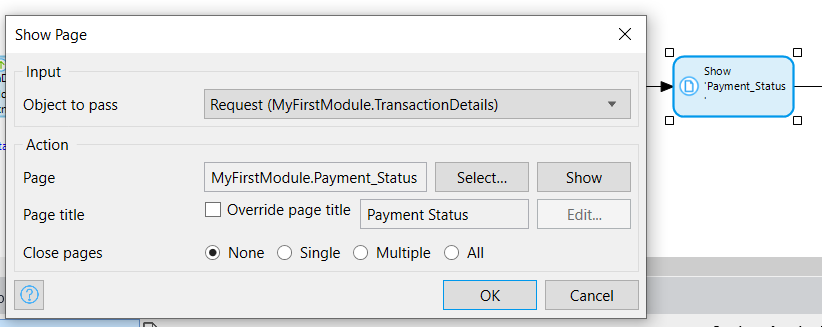
Finally, the microflow should be like the one below.

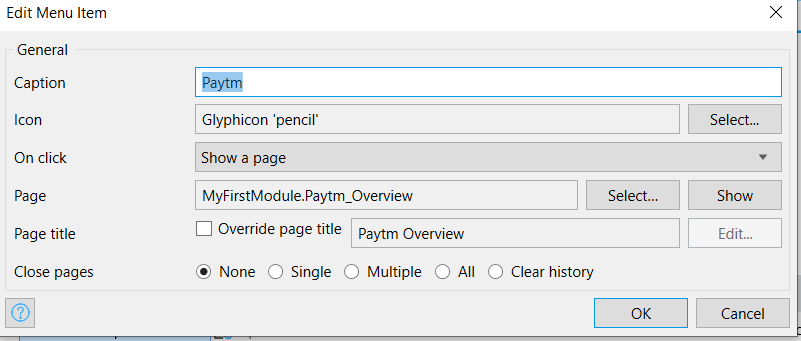
Step11: Configure Navigation
Menu> New Item
Configure like below

Step12: Run the Application
Click on Paytm
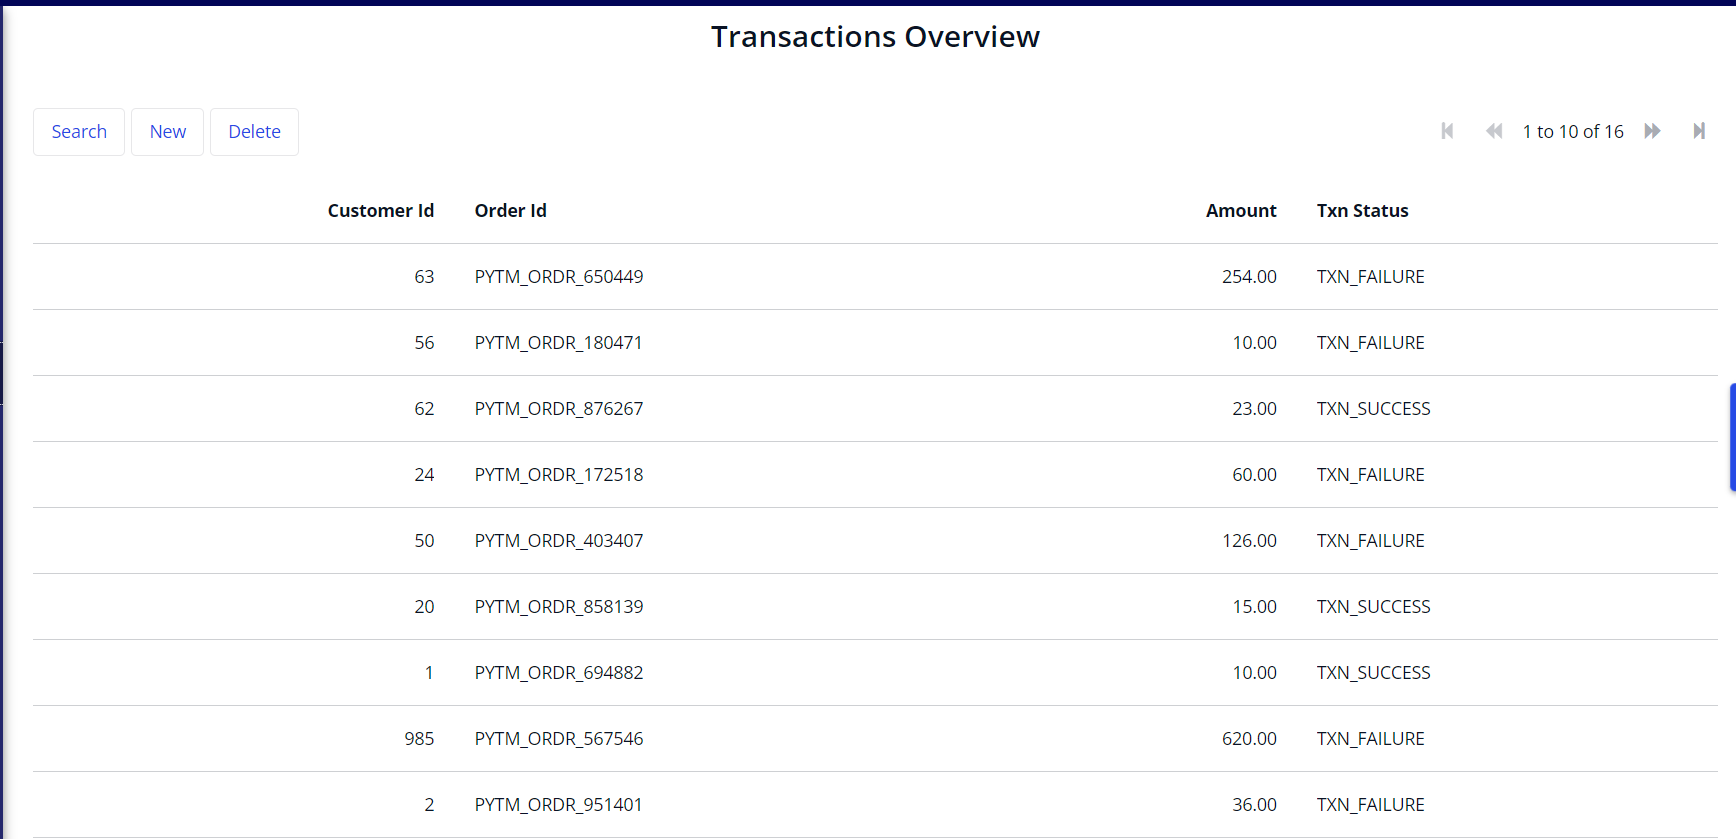
Click on New
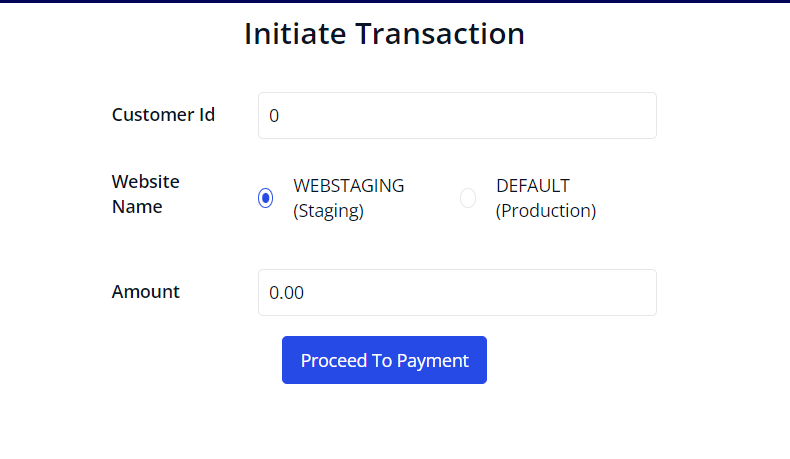
Enter a Customer Id ex:1, Select Website name as WEBSTAGING, and enter amount ex: 10.
Click on Proceed To Payment it will redirect to the Paytm payment page. Choose payment methods such as 1)Prepaid, Debit & Credit Cards 2) Net banking.
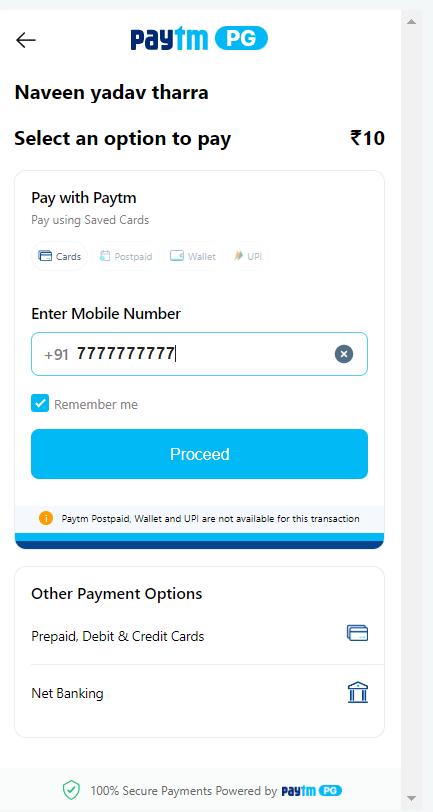
Follow the below link to test credentials
https://business.paytm.com/docs/test-instruments/testing-integration?ref=otherlinks.
Note: The wallet payment method is sometimes not working.
Click on Proceed
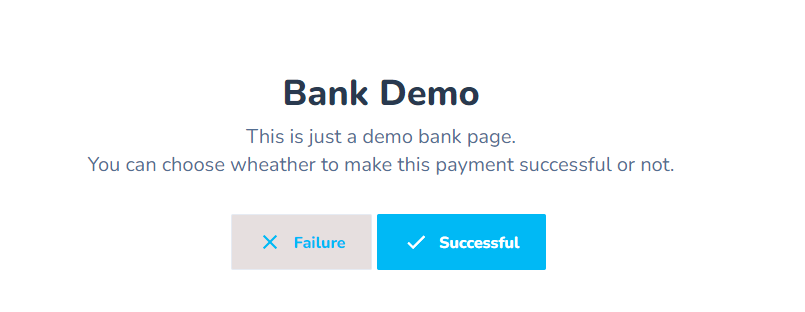
Next, Click on Successful after this to direct you to our mendix page.
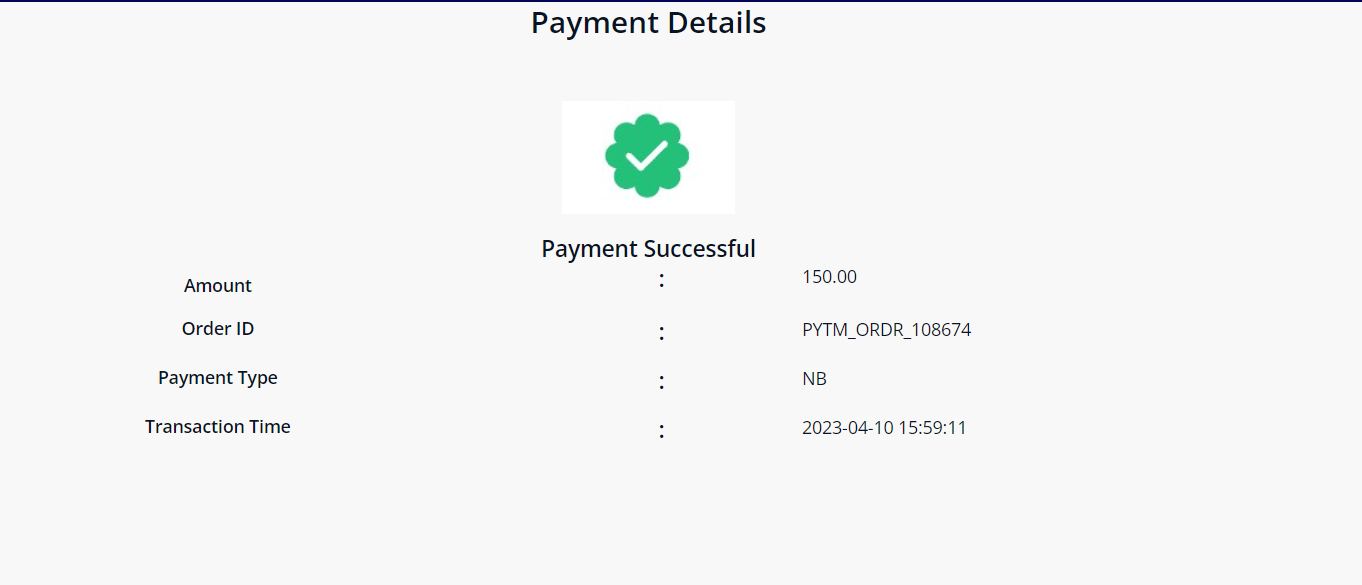
Unlock the power of Paytm integration in Mendix and take your payment processes to the next level. Start leveraging the benefits today and witness improved customer satisfaction and accelerated business growth.
If you are still facing any issues, Go to Mendix Market Place, Search ‘Paytm - Connector,’ or follow the below link
https://marketplace.mendix.com/link/component/209509.